How to use
Every screen, step by step.
Each section below shows a screen of the workspace, the objective it serves, and the numbered steps to get there — read it here, or take the whole thing with you as a slide deck.
01
Start here
Two screens take you from "does this law apply to us" to a live workspace.
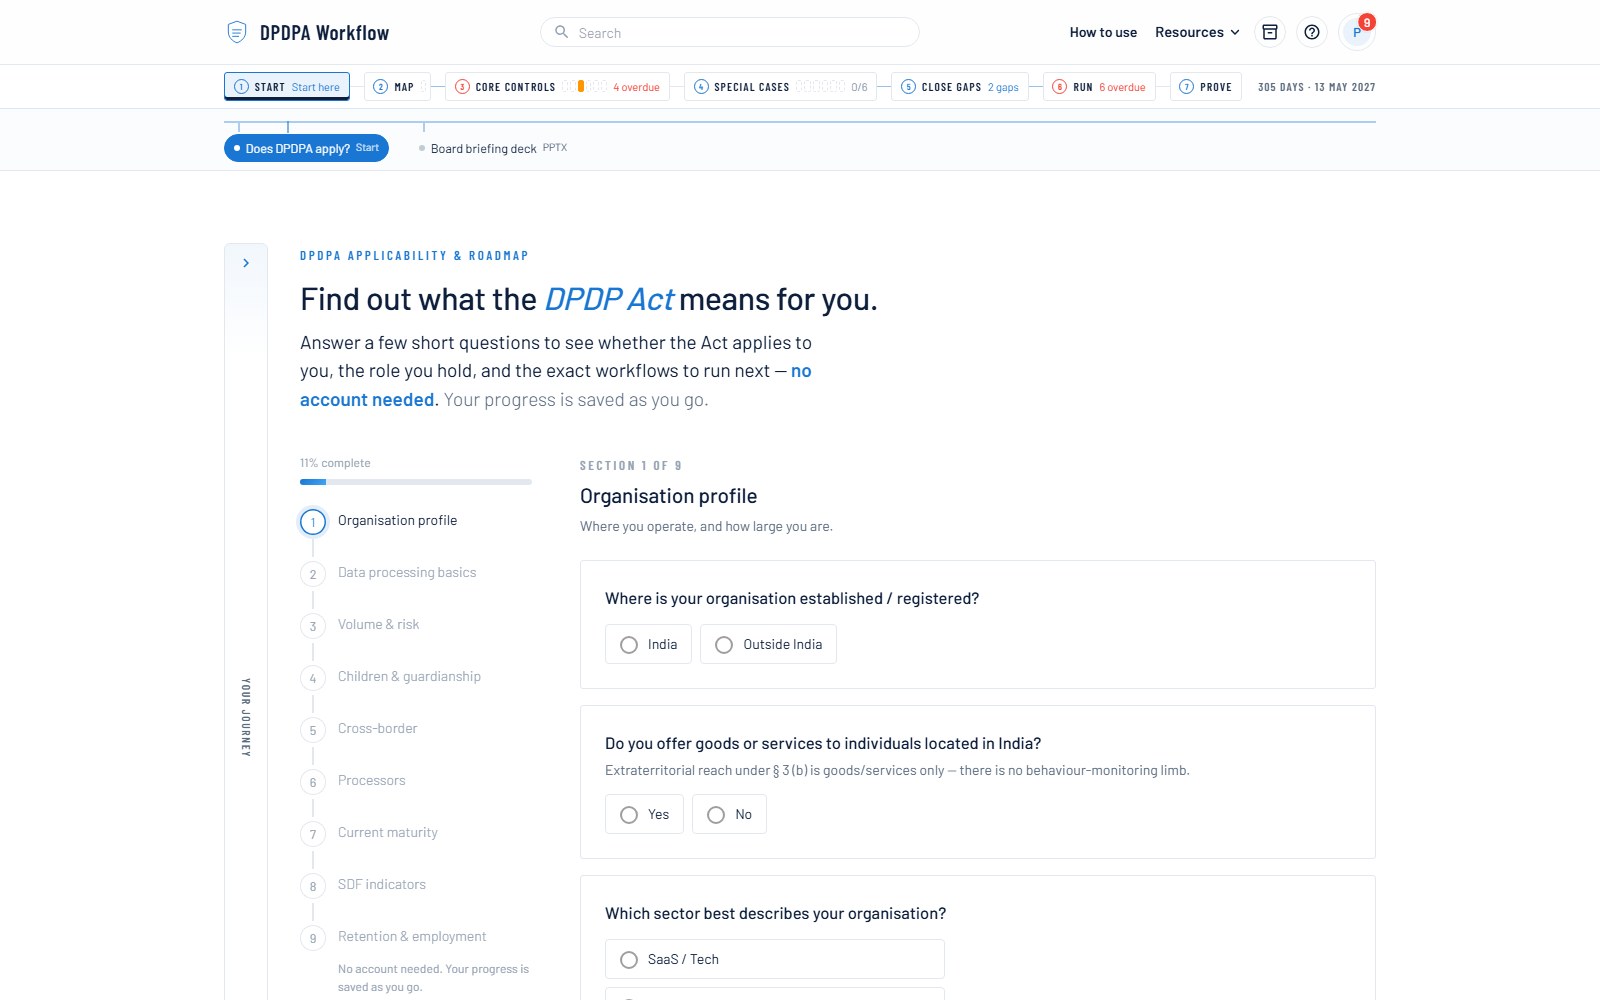
The free applicability check
The objective
Learn whether the DPDP Act applies to you, the role you hold, and what to do first — no account needed.
- 1
Open the assessment — no sign-in is asked for.
- 2
Answer the 28 questions about your sector, data and users; every question saves as you go, so you can leave and resume.
- 3
Read your result: whether the Act applies, your likely role, the Significant Data Fiduciary indicator, and a sequenced roadmap.
- 4
Sign in when you want to keep it — the roadmap attaches to your new workspace and is filed in your Document locker as a Word report.
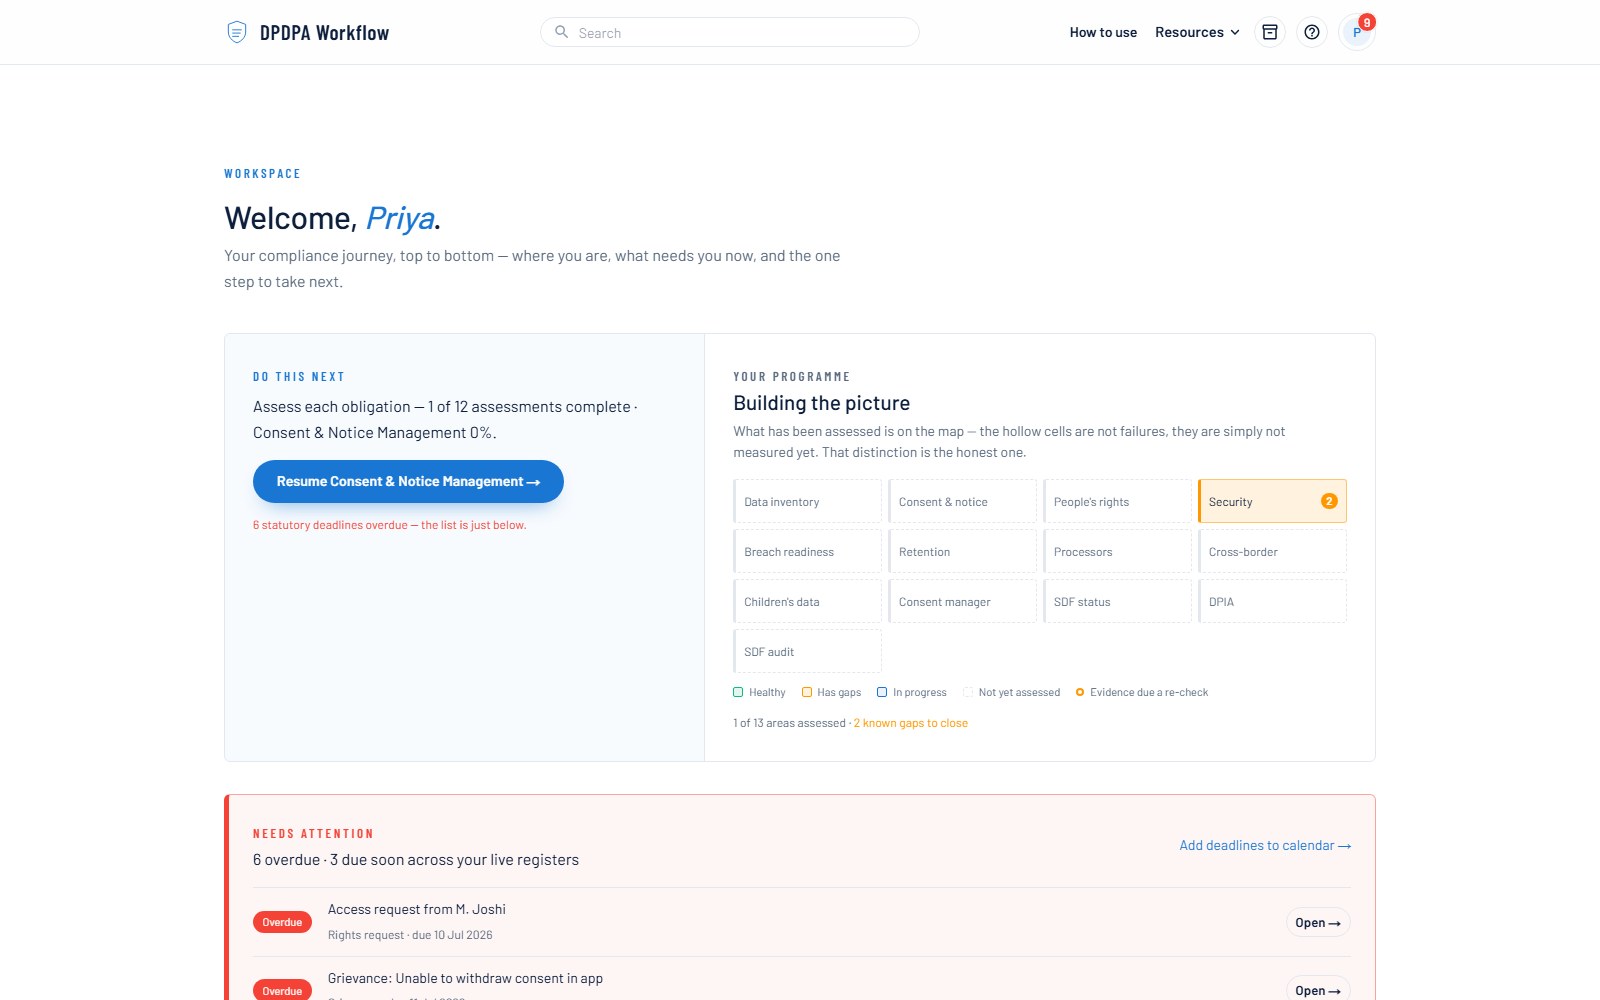
Your compliance workspace
The objective
See where you stand, what needs you now, and the one step to take next — the whole programme on a single screen.
- 1
Read the programme map first — one labelled tile per obligation area: green is assessed and healthy, amber carries its open-gap count, hollow simply has not been assessed yet. No fake percentages. The same journey rides under the header on every page as seven numbered stations — click one to unfold its tree of modules and registers, with the page you are on highlighted.
- 2
Check the attention strip: overdue and due-soon items across all live registers, each one click away.
- 3
Navigate with the journey bar under the header — the same seven stations on every page. Click a station to fan out its modules and registers; the page you are on shows as a solid blue chip.
- 4
Follow the "do this next" card when unsure; it always points at the FIRST unfinished stop in walking order — even if that means going back a step you skipped past. Each stop builds on the ones before it.
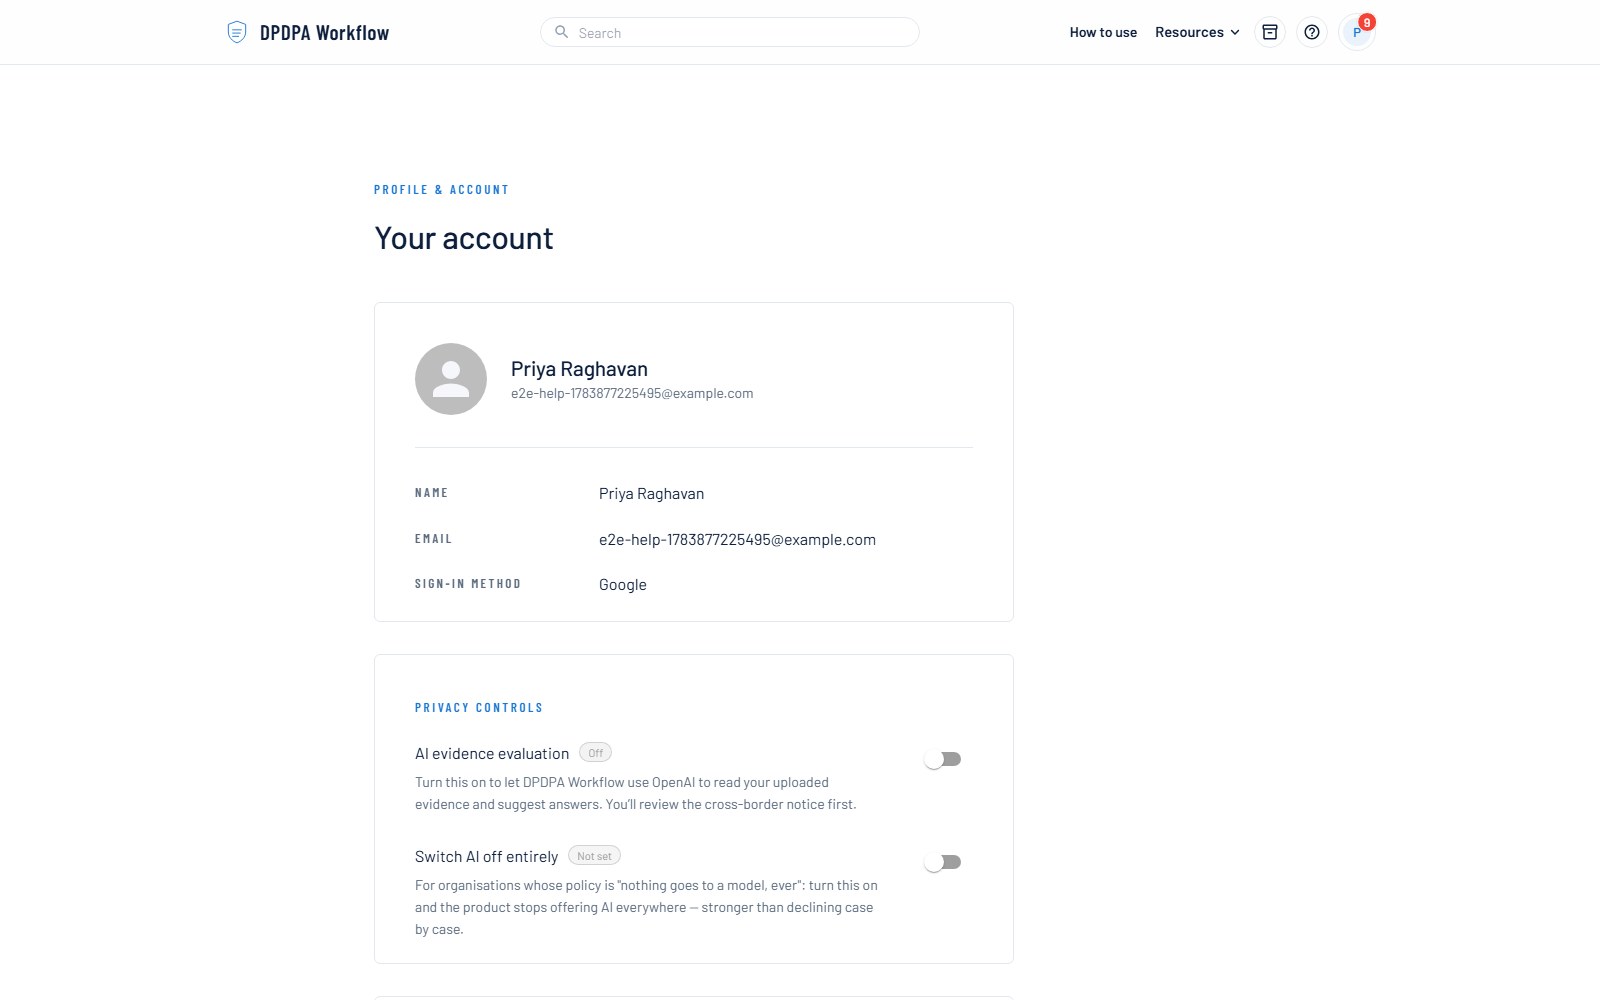
Workspace members & roles
The objective
Bring in colleagues or an external consultant — everyone works on the same registers and the same evidence ledger, and every act records who did it.
- 1
Click the workspace name in the header and choose Workspace settings. Owners manage members and destructive actions; members do everything else.
- 2
Invite by email and pick a role — the invitation only works for that exact address, and can be sent by email or shared as a link.
- 3
The invitee signs in with their own Google account and accepts; the workspace becomes their active one.
- 4
The active workspace always shows beside your avatar — belong to several and the same menu switches between them, so nothing is ever filed into the wrong organisation.
02
Set up — build the baseline
Work through the assessment modules; each one grades your current practice, question by question, and every question names the clause behind it.
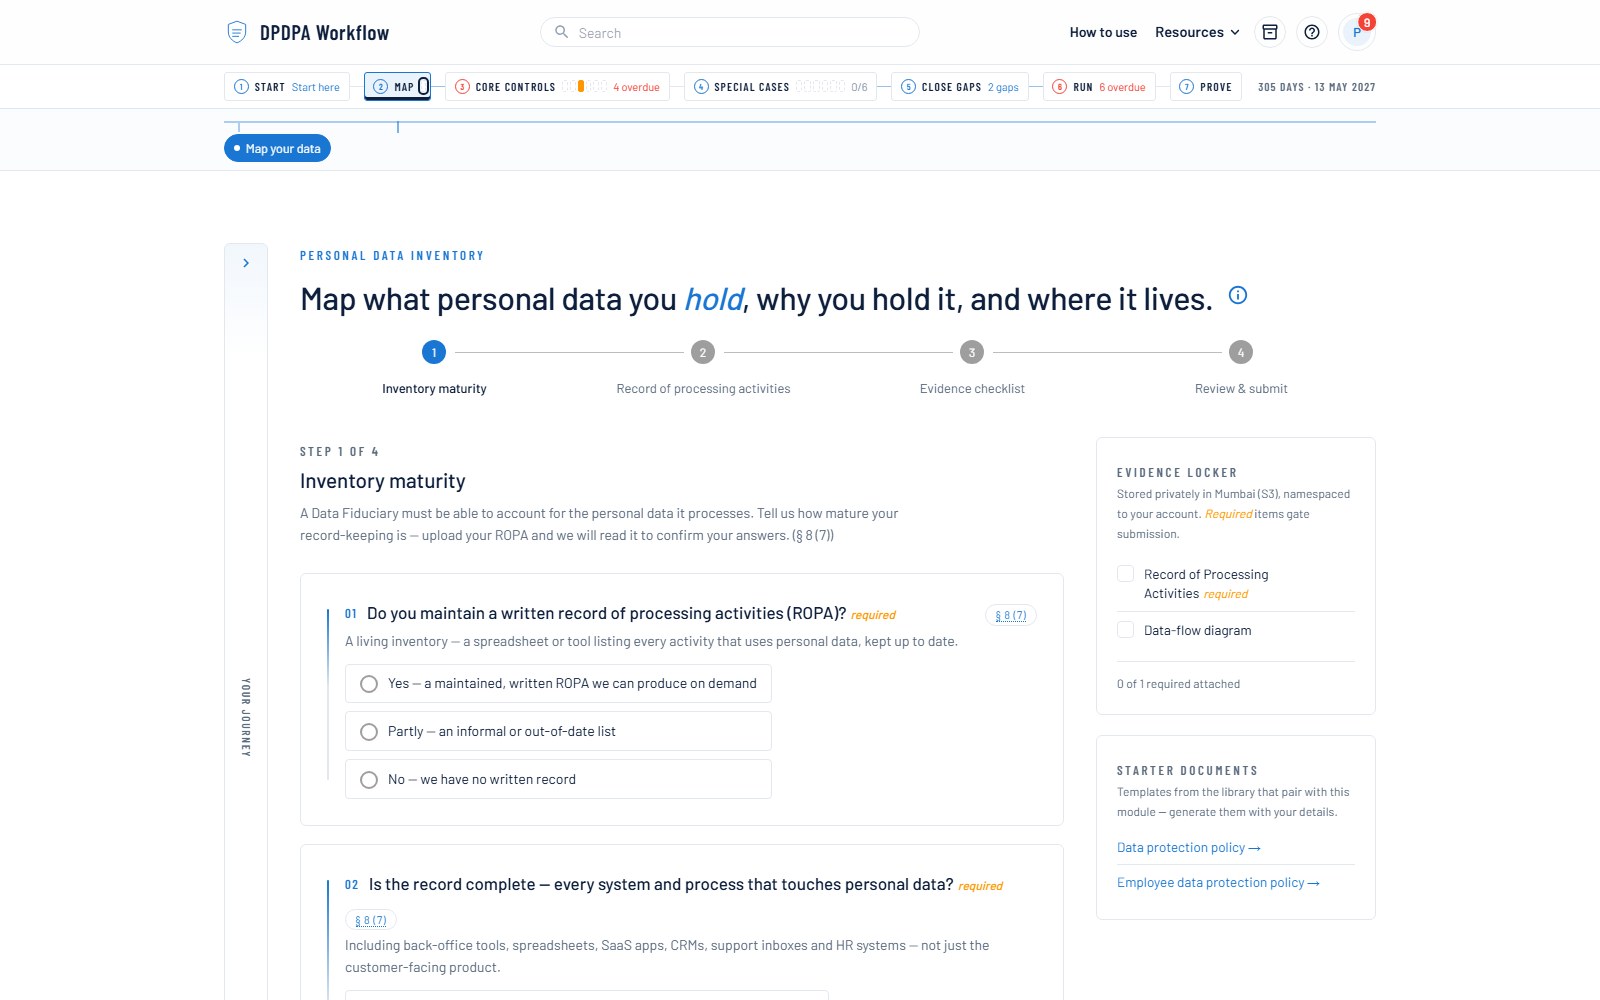
Personal data inventory (ROPA)
The objective
Build the map of what personal data you hold, why, and on what lawful basis — everything else builds on this.
- 1
Open station ② Map on the journey bar and click "Map your data".
- 2
Add each processing activity: what data, whose, the purpose, and the lawful basis. Starter sets prefill the usual suspects — edit rather than start blank.
- 3
Answer the assessment questions that follow; pick "Not sure — we haven't checked yet" honestly where true.
- 4
Submit to lock the baseline. The inventory becomes the reference every other module reads.
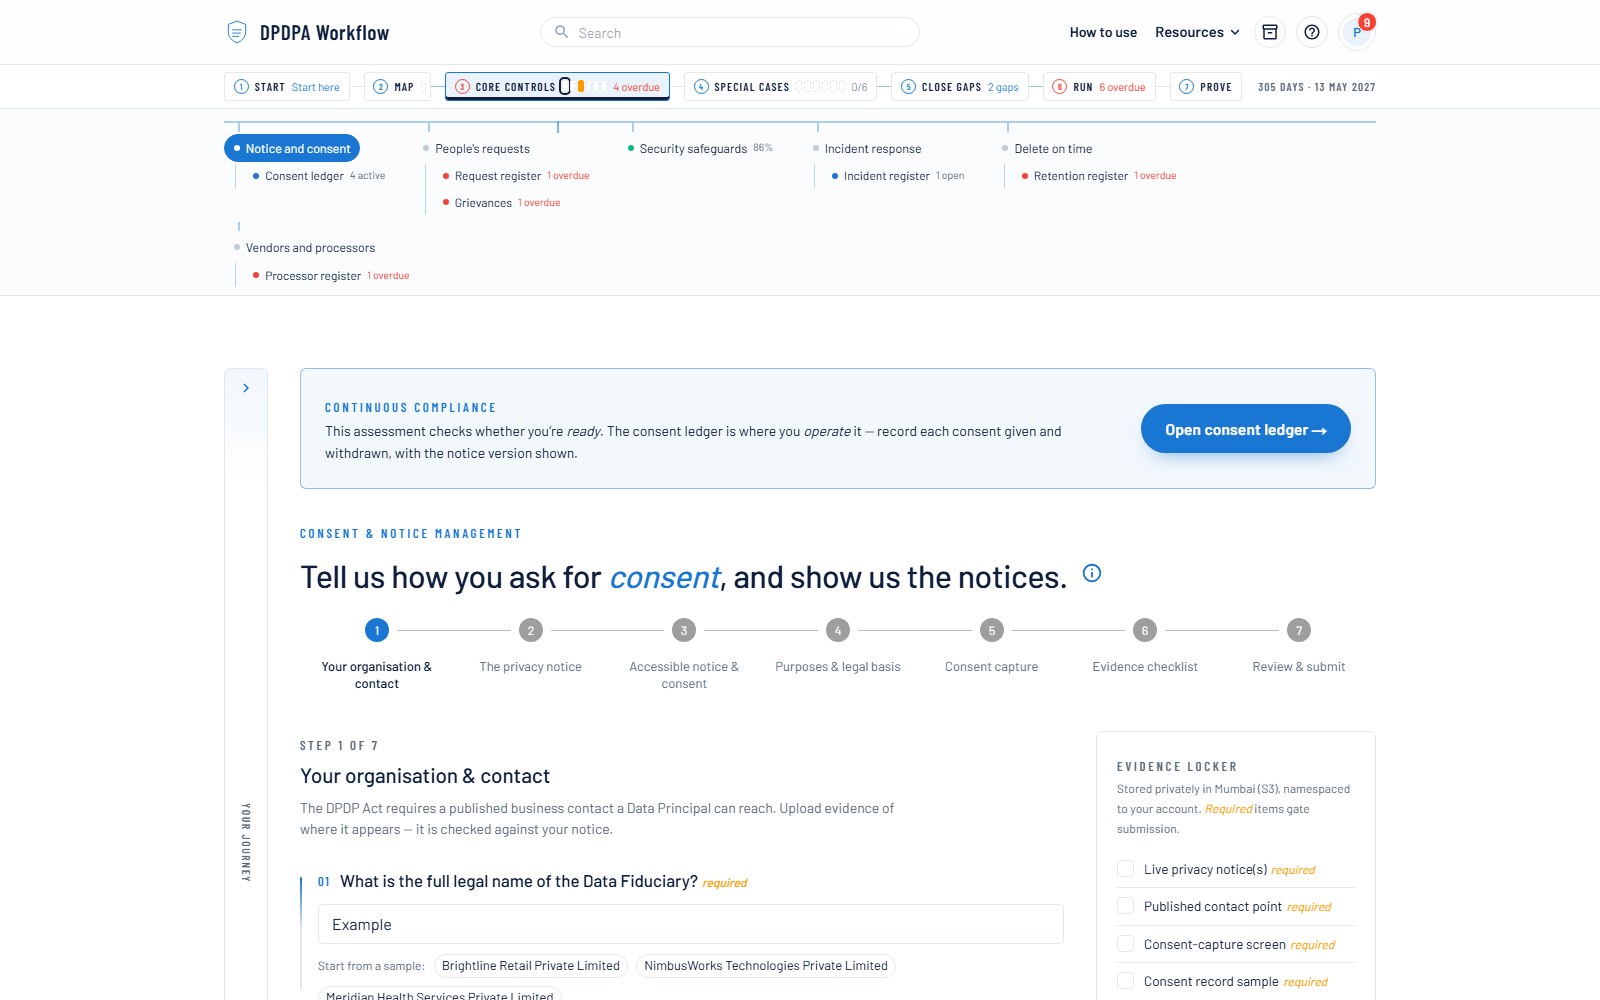
Consent & notice
The objective
Find the gaps between your notices/consent flows and the § 5–6 standard, with a readability score on your actual notice text.
- 1
Grade each question about how you notify and take consent today.
- 2
Paste your real privacy-notice text into the readability checker — it scores plain-language compliance and suggests the grade.
- 3
Attach evidence (your live notice, consent screenshots) where the question offers an upload.
- 4
Submit, then open the consent ledger to start recording consents against notice versions.
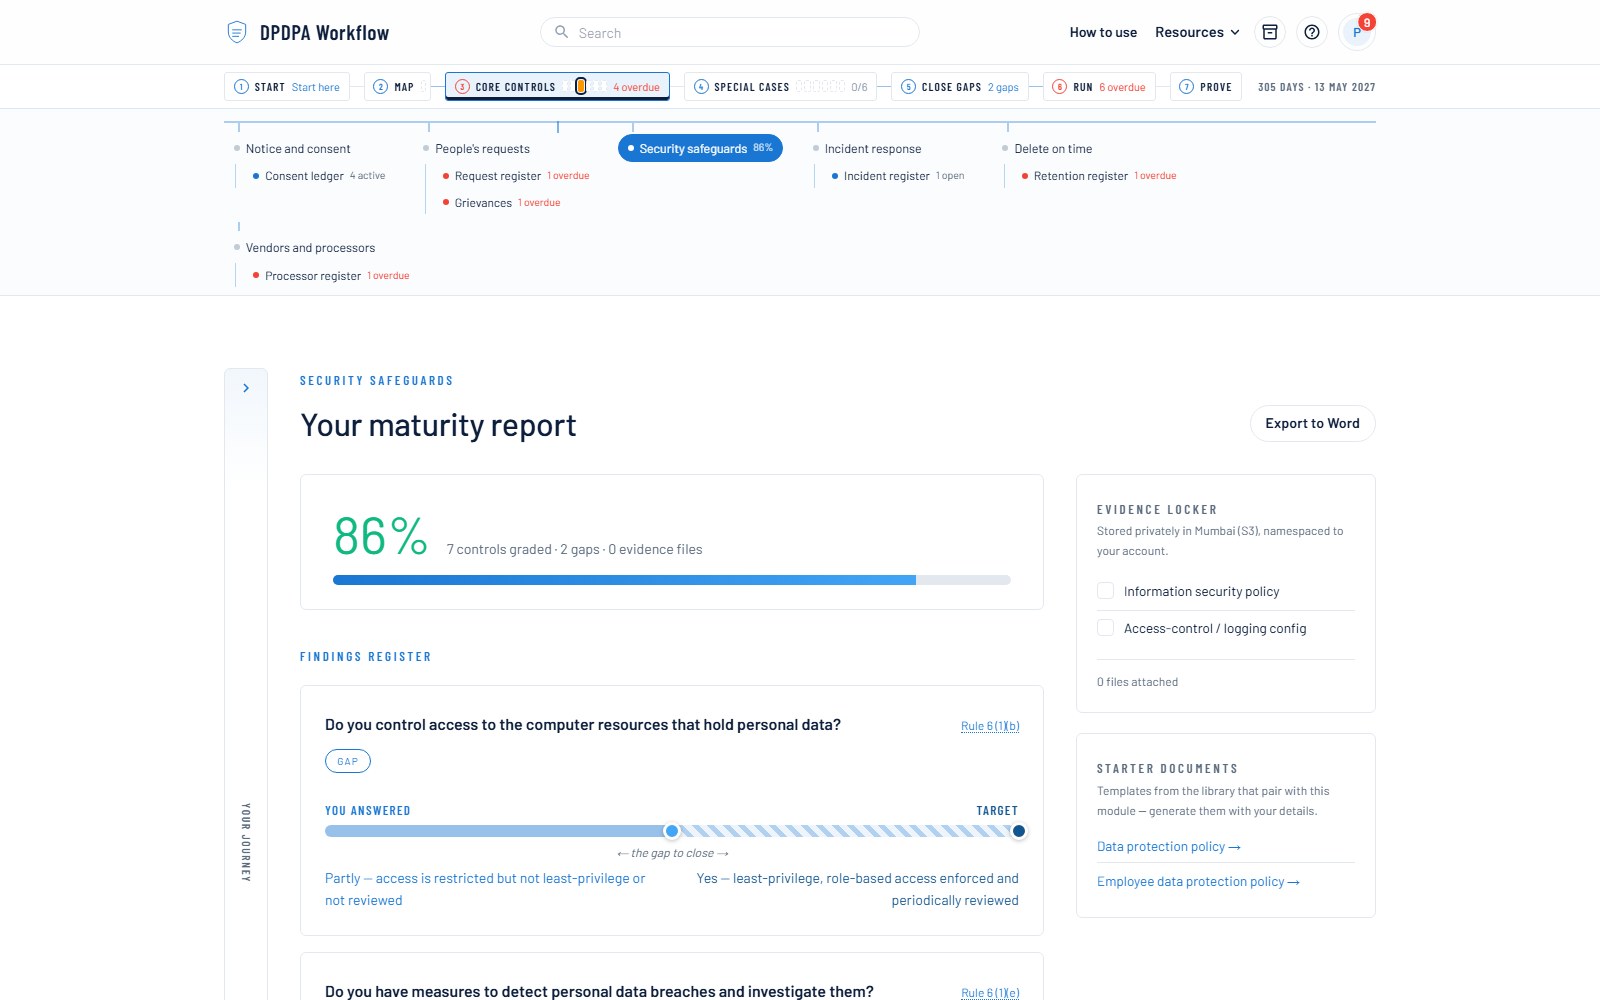
Security safeguards
The objective
Grade the Rule 6 baseline — encryption, access control, logging, backups — the duty the Act weighs heaviest.
- 1
Answer the seven control questions; each names the exact Rule 6 safeguard it tests.
- 2
Upload evidence (a security policy, a config export) — the optional AI review can suggest answers from it.
- 3
Read the maturity report: your score, each gap, the answer you gave, and the compliant target.
- 4
Fix the ambers first — gaps here sit at the top of your remediation plan.
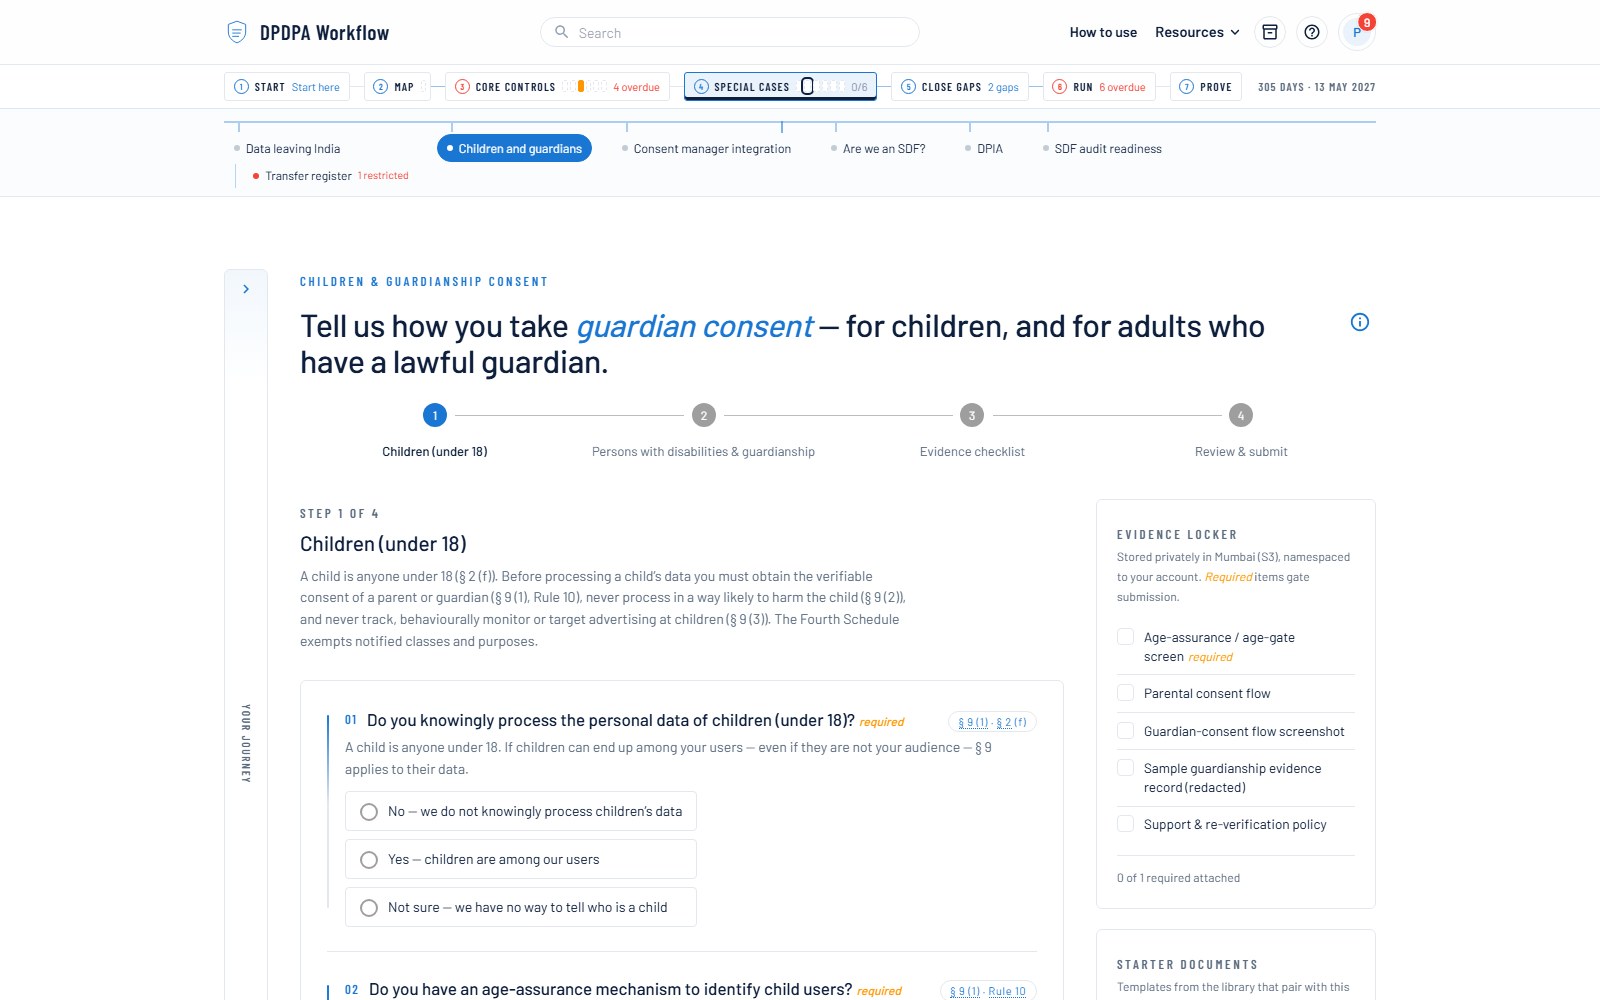
Children & guardianship
The objective
Check age assurance and guardian-consent handling, and rule out tracking or targeted ads aimed at children.
- 1
Say whether minors can be in your data at all — the module sizes itself to your answer.
- 2
Grade how you verify age and take verifiable guardian consent.
- 3
Confirm no behavioural monitoring or targeted advertising is directed at children.
- 4
Check the Fourth Schedule exemptions if you are a clinical, educational or childcare setting.
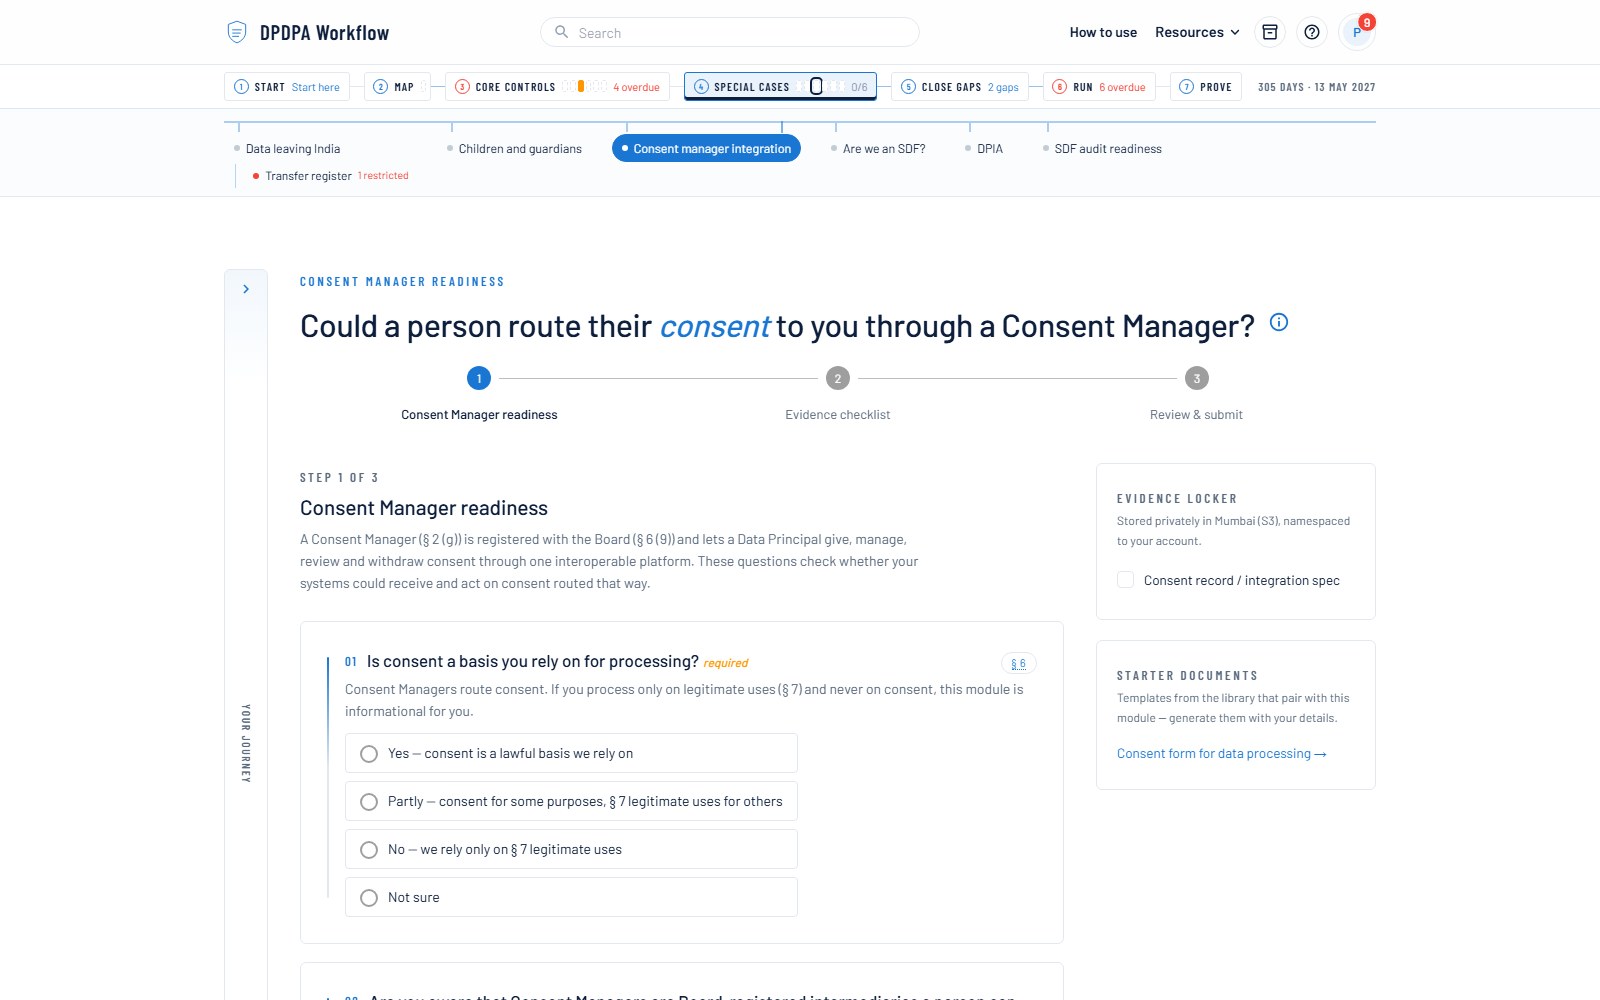
Consent Manager readiness
The objective
Prepare for consents that arrive through registered Consent Manager platforms.
- 1
Assess whether your systems could receive, act on and honour a consent given through a Consent Manager.
- 2
Grade withdrawal handling — a withdrawal through a Consent Manager must work end to end.
- 3
Note the gaps; interoperability obligations arrive with the consent-phase dates.
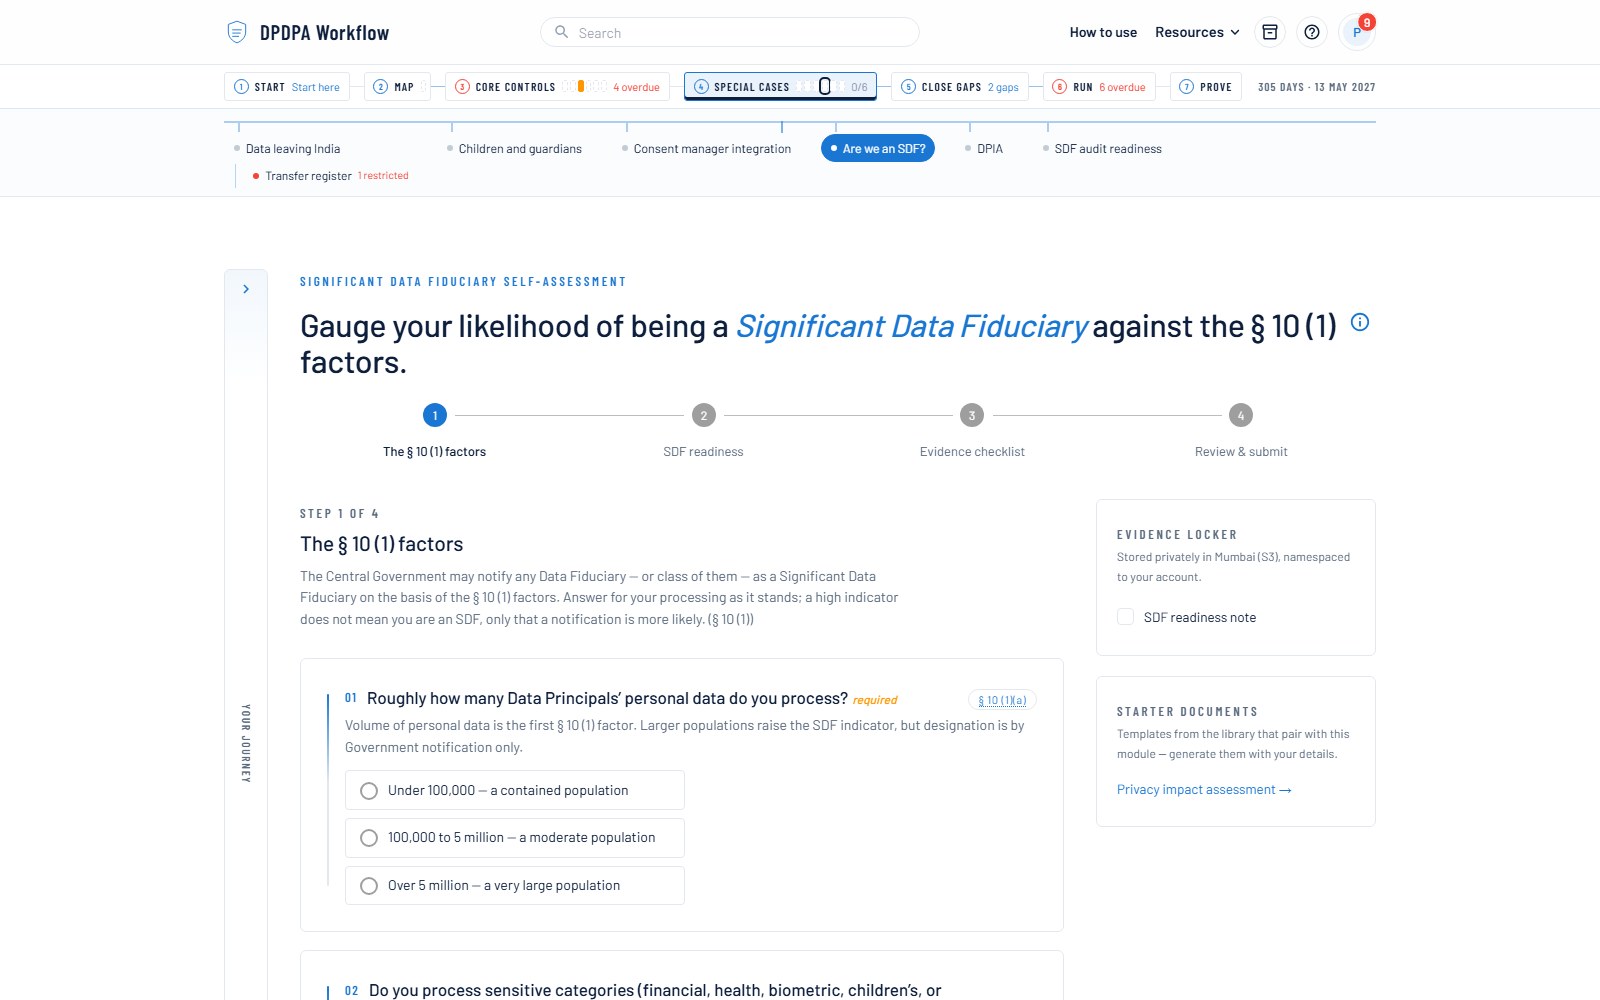
SDF assessment
The objective
Estimate whether you are likely to be designated a Significant Data Fiduciary before the Government tells you.
- 1
Walk the designation factors: volume and sensitivity of data, risk to Data Principals, and the other § 10 factors.
- 2
Read your indicator band — low, medium or high.
- 3
If medium or high, open the DPIA and SDF audit modules next; those duties arrive with designation.
03
Run — the live registers
The Act runs on statutory clocks. Each register starts the right clock the moment you log an item, and overdue items surface on the dashboard by themselves.
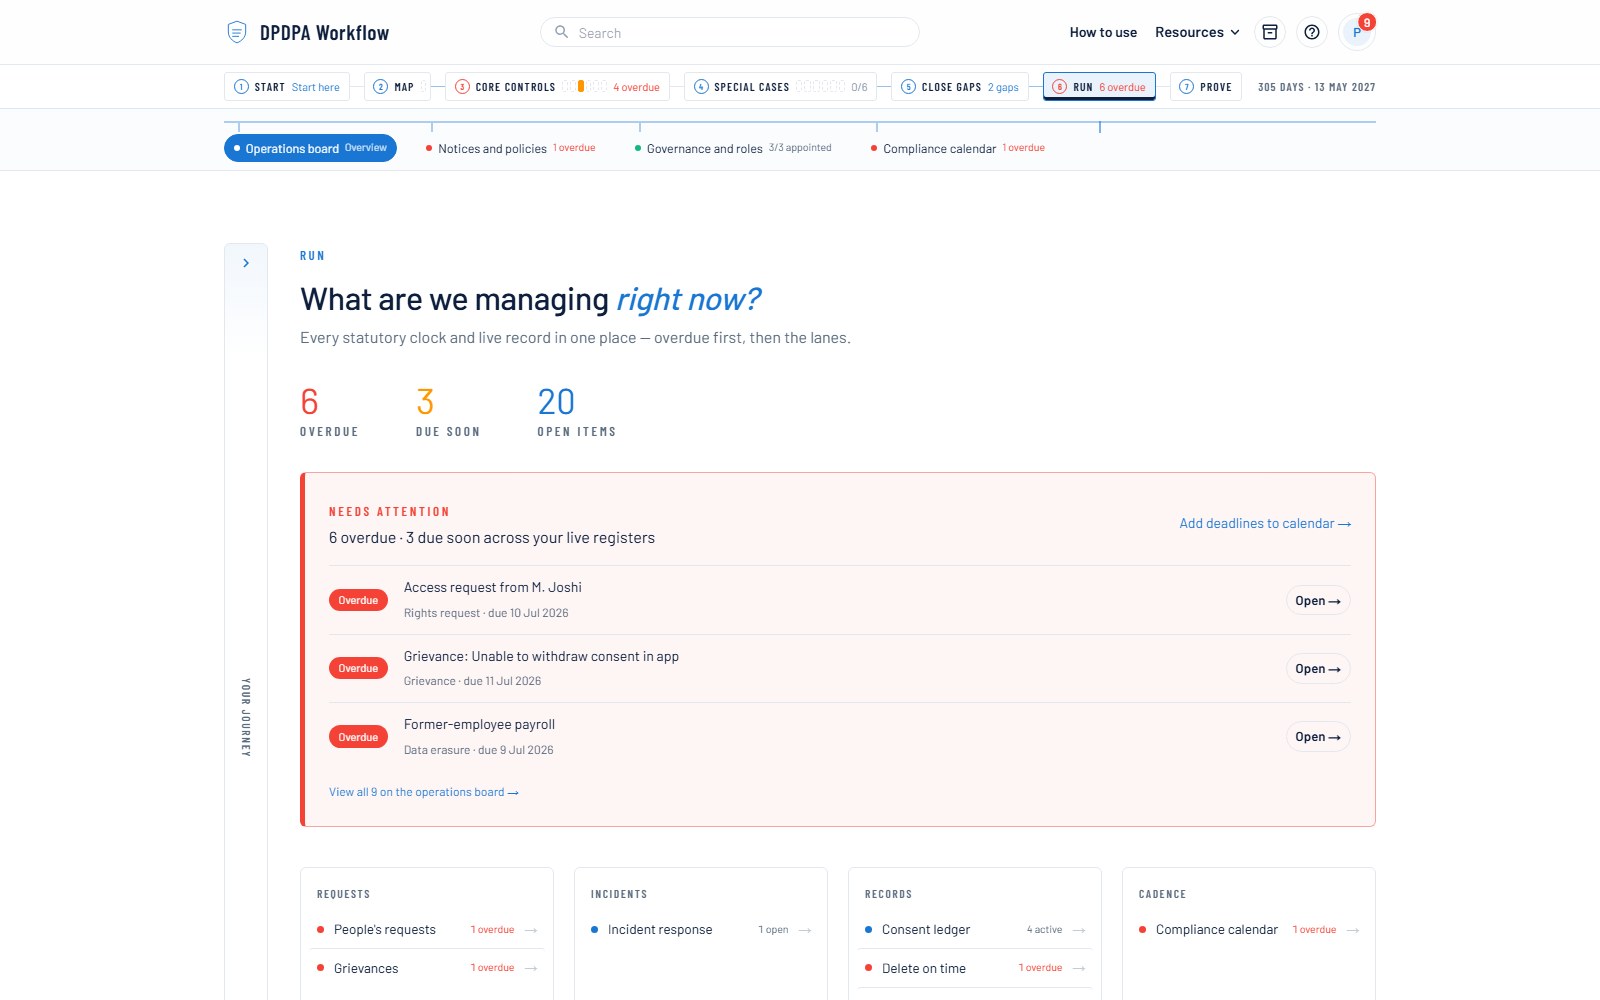
The operations board
The objective
See everything you are managing right now — overdue first, then the four work lanes.
- 1
Open station ⑥ Run on the journey bar and click "Operations board".
- 2
Read the pulse strip: overdue, due soon and open items across every register.
- 3
Work the inbox top-down — it is one prioritised list across all statutory clocks.
- 4
Use the lanes — requests, incidents, records, cadence — to jump into any register.
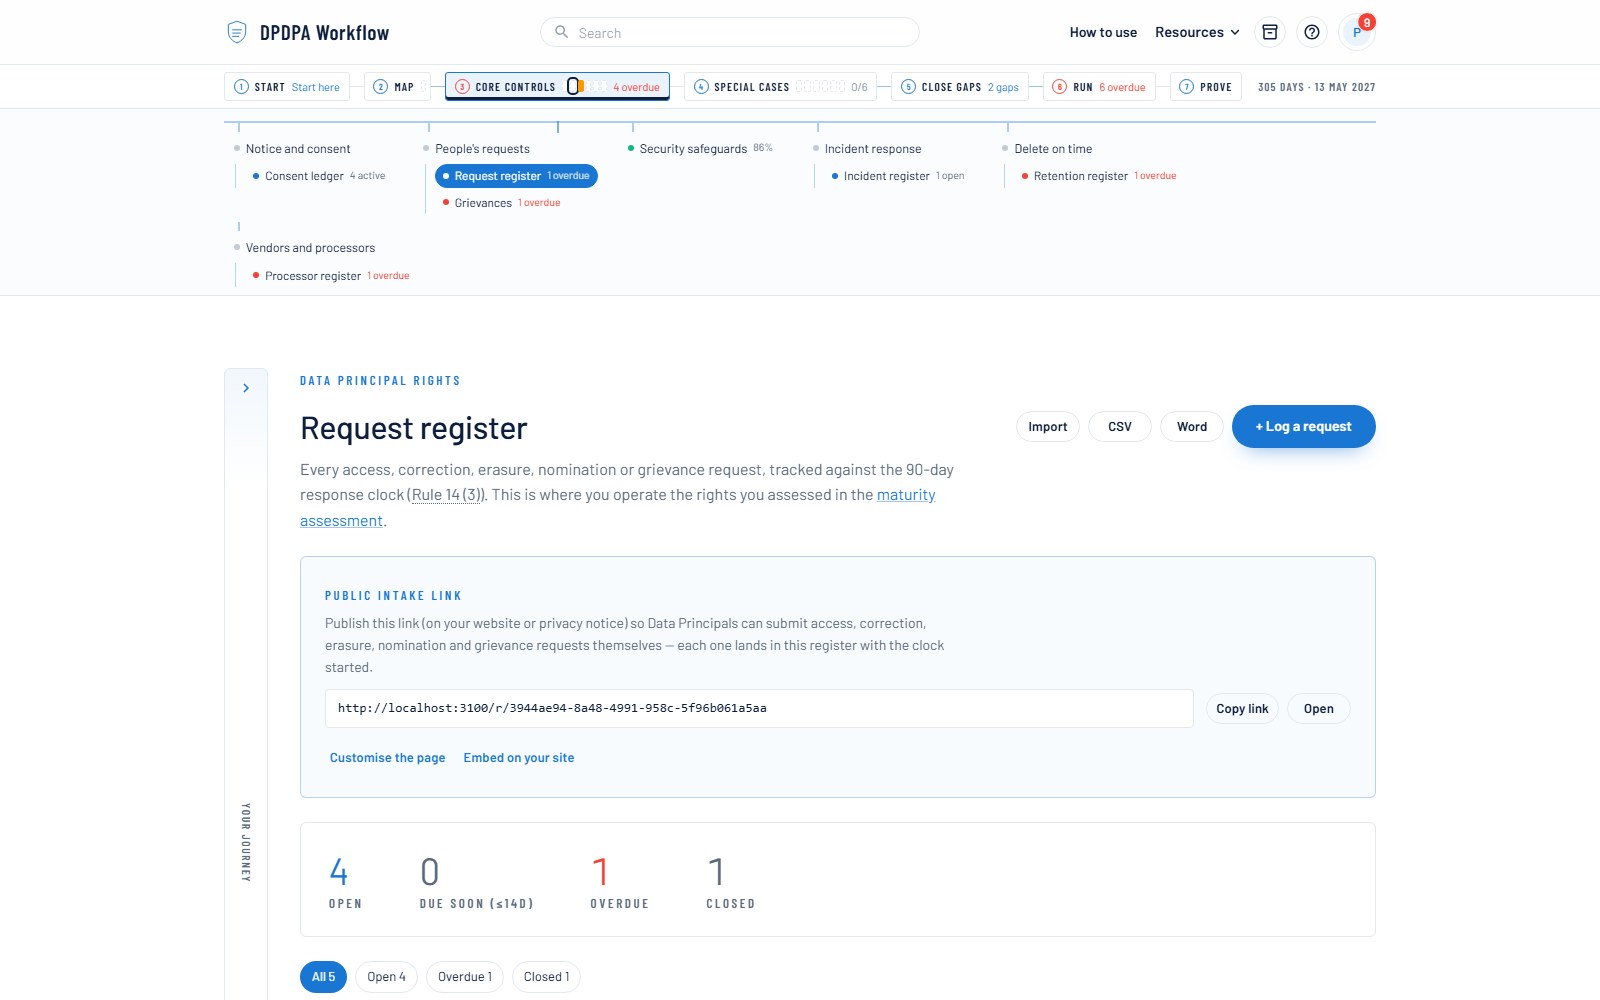
Rights request register
The objective
Answer every access, correction, erasure and nomination request inside the 90-day window — with proof.
- 1
Log each request as it arrives — channel, identity verification, what is asked. The 90-day clock starts itself. Arriving with a spreadsheet? Import it as CSV.
- 2
Share your public intake link (or embed it on your site) — portal submitters get an acknowledgement and a tracking link to check their own status.
- 3
Work the queue: the register sorts by deadline, and overdue rows go red on the dashboard.
- 4
Close each request with an outcome note — the requester sees it on their tracking page, and the register keeps it as your Rule 14 evidence.
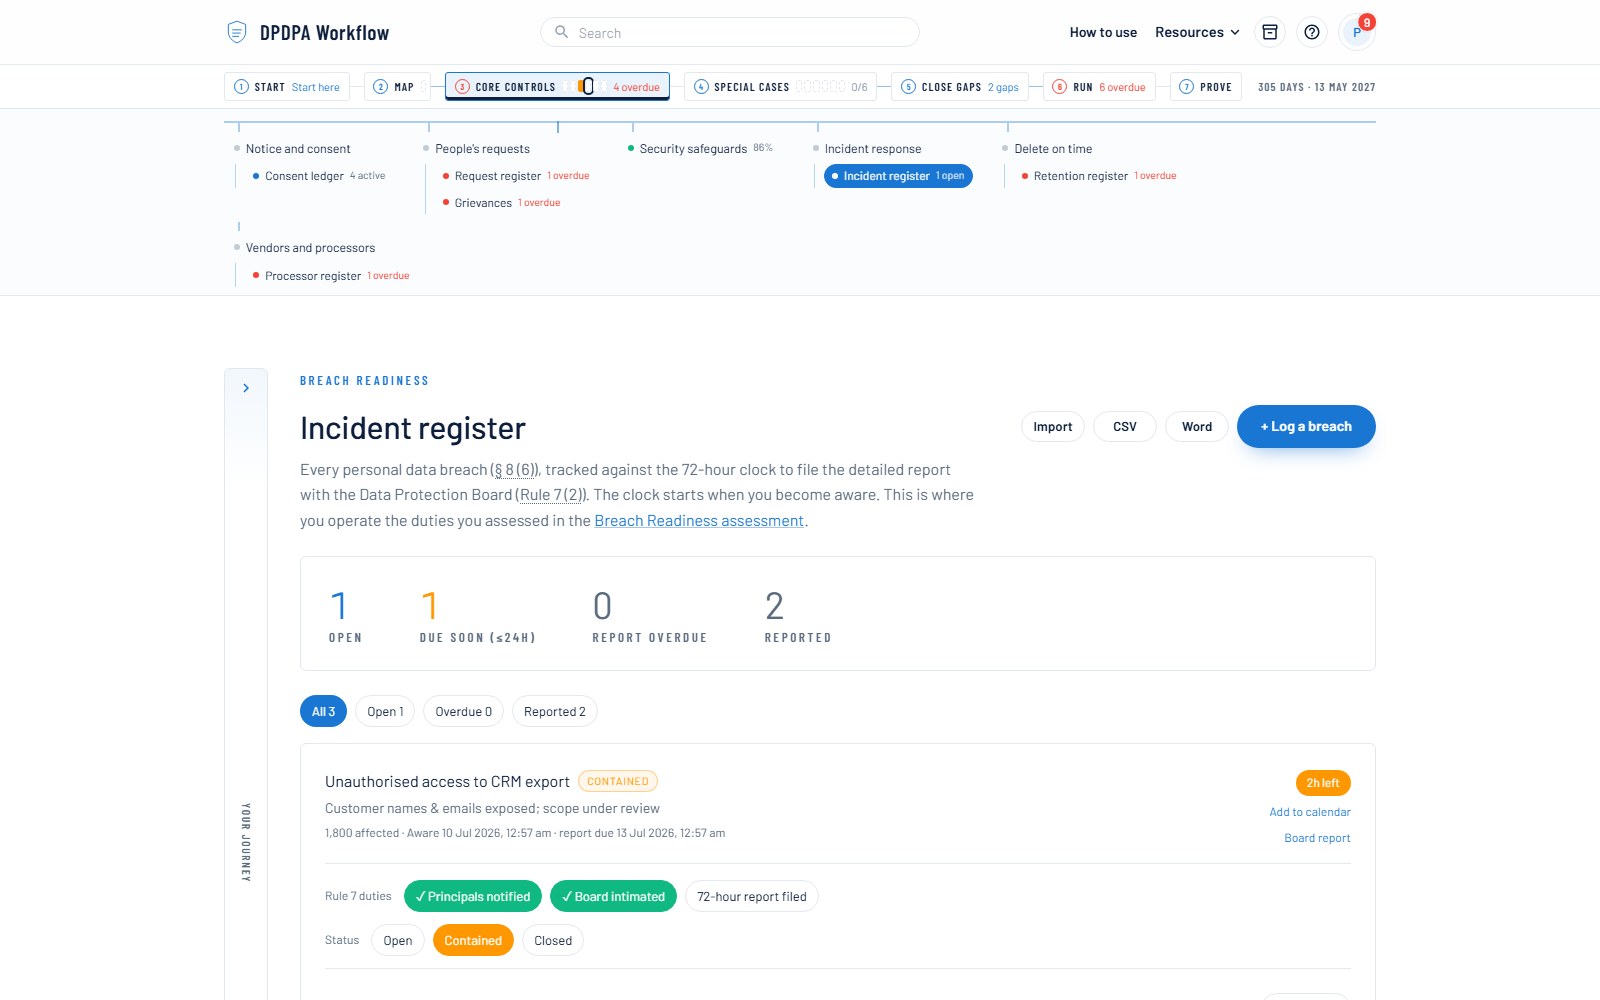
Breach incident register
The objective
Meet the 72-hour Board reporting duty with a drilled, documented response.
- 1
Log the incident the moment you become aware — the 72-hour Board clock starts from awareness, and the register starts it for you.
- 2
Record who was notified: affected Data Principals without delay, the Board intimation, containment steps.
- 3
Generate the Rule 7 Board report as a Word document straight from the incident.
- 4
Close with root cause and remediation — closed incidents stay as your evidence trail.
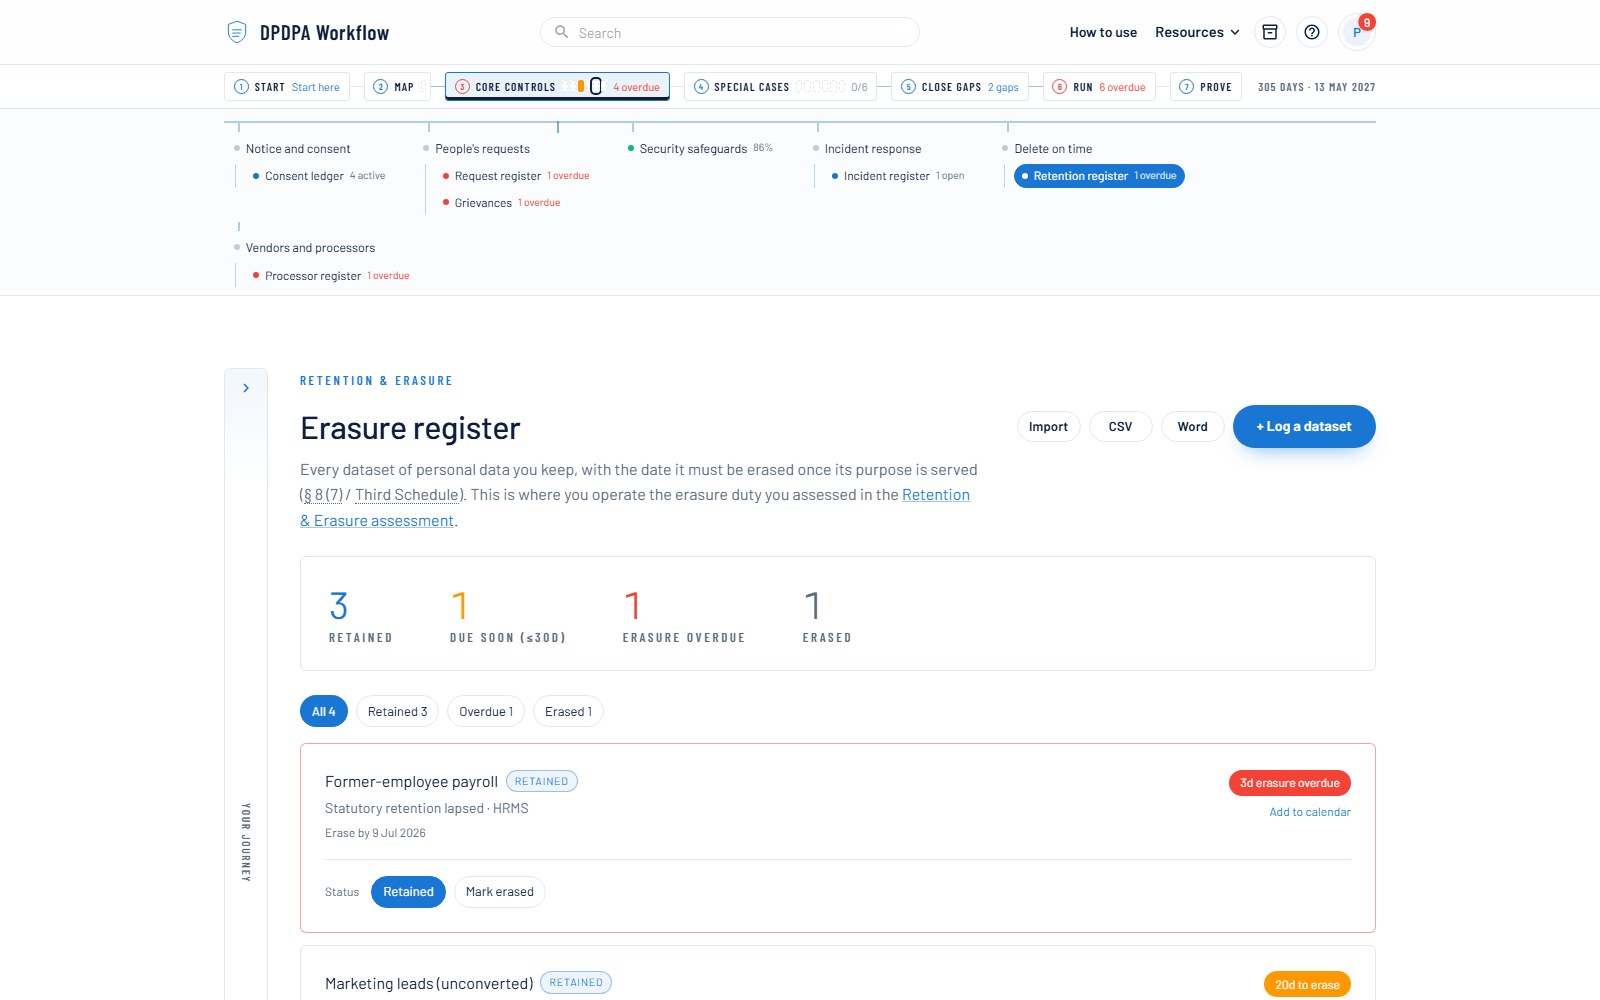
Retention & erasure register
The objective
Erase personal data when its purpose is served — on a visible clock, dataset by dataset.
- 1
List each dataset with its retention basis and erase-by date.
- 2
Watch the register: items nearing their date surface on the dashboard before they become findings.
- 3
Mark datasets erased when done — date-stamped, so you can prove deletion later.
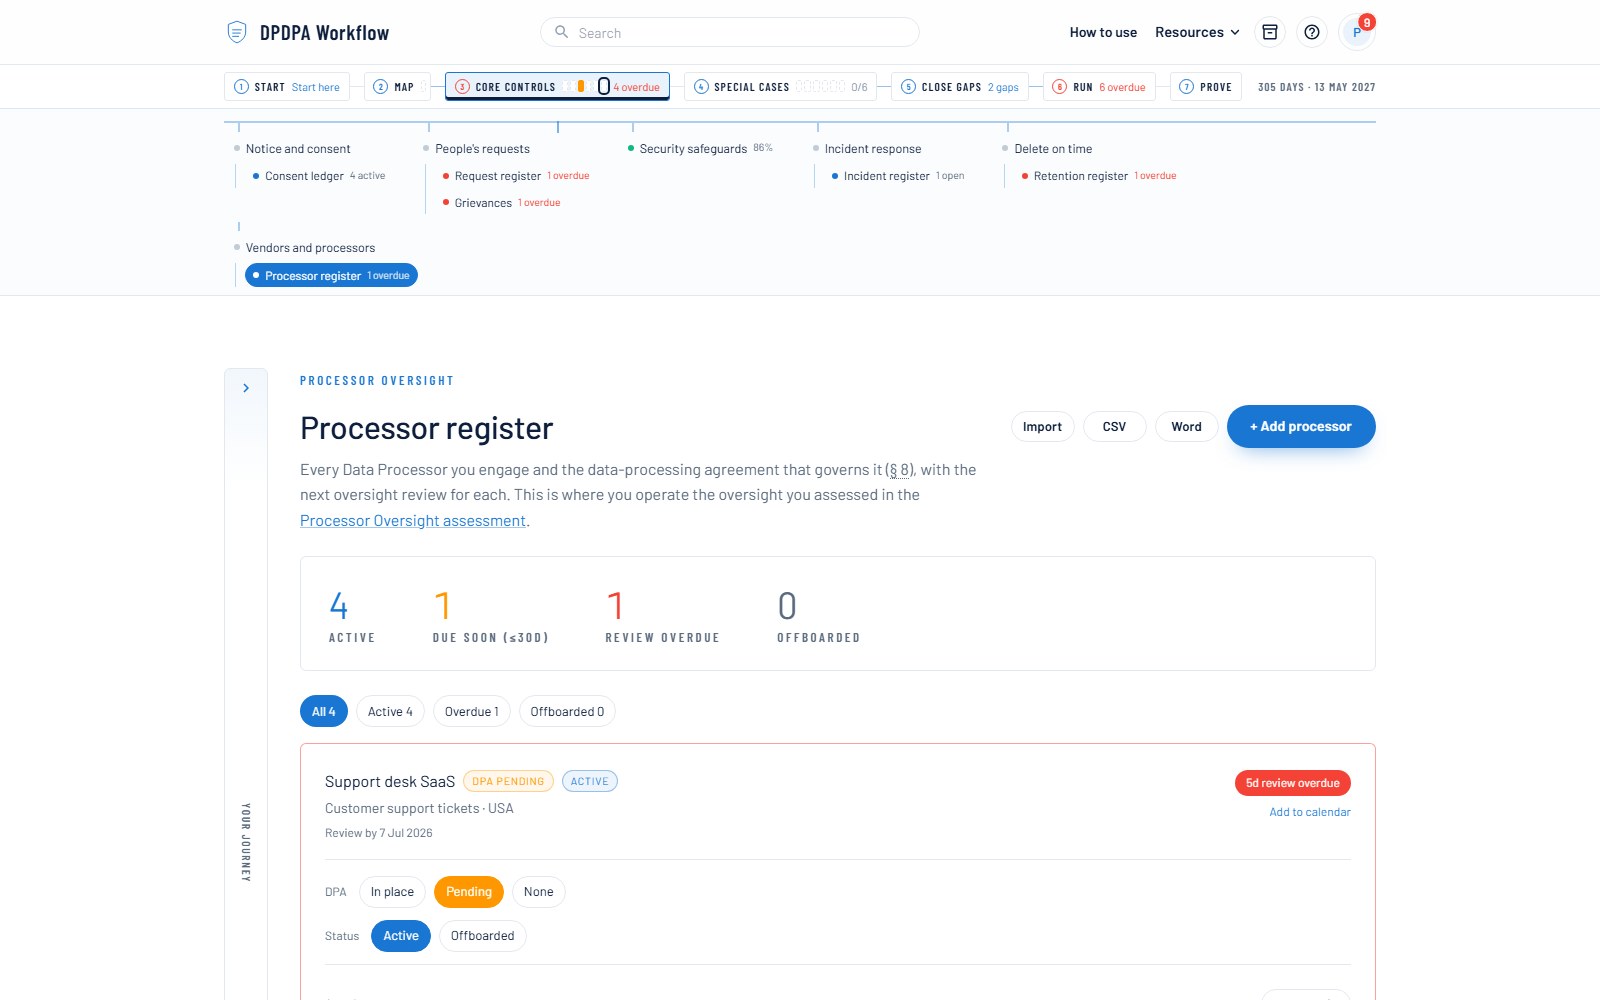
Processor register
The objective
Evidence a valid contract and periodic oversight for every vendor that touches personal data.
- 1
Add every processor — hosting, payments, email, support — with purpose and location.
- 2
Record the data-processing agreement status and attach the signed DPA.
- 3
Set the next review date; the calendar nags you when oversight falls due.
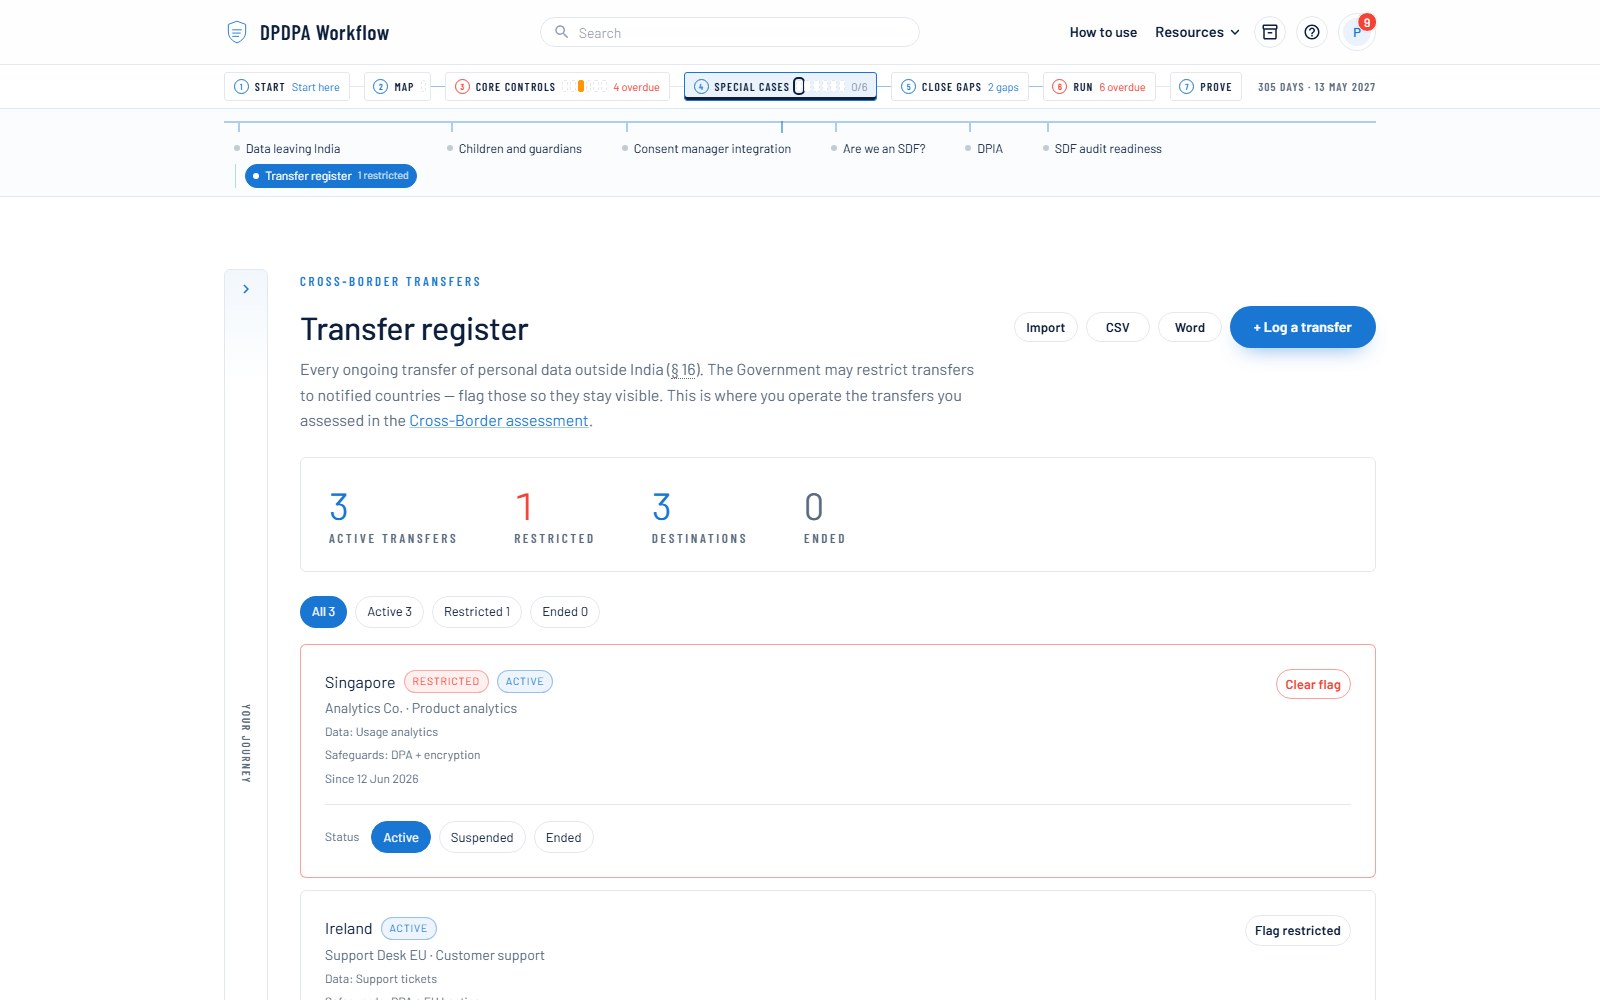
Cross-border transfer register
The objective
Map every transfer of personal data outside India and catch restricted destinations.
- 1
Record each transfer route: destination country, recipient, data categories, purpose.
- 2
Note the safeguards on each route — contractual clauses, encryption, hosting terms.
- 3
Watch the restricted flag: destinations the Government restricts are marked on the register.
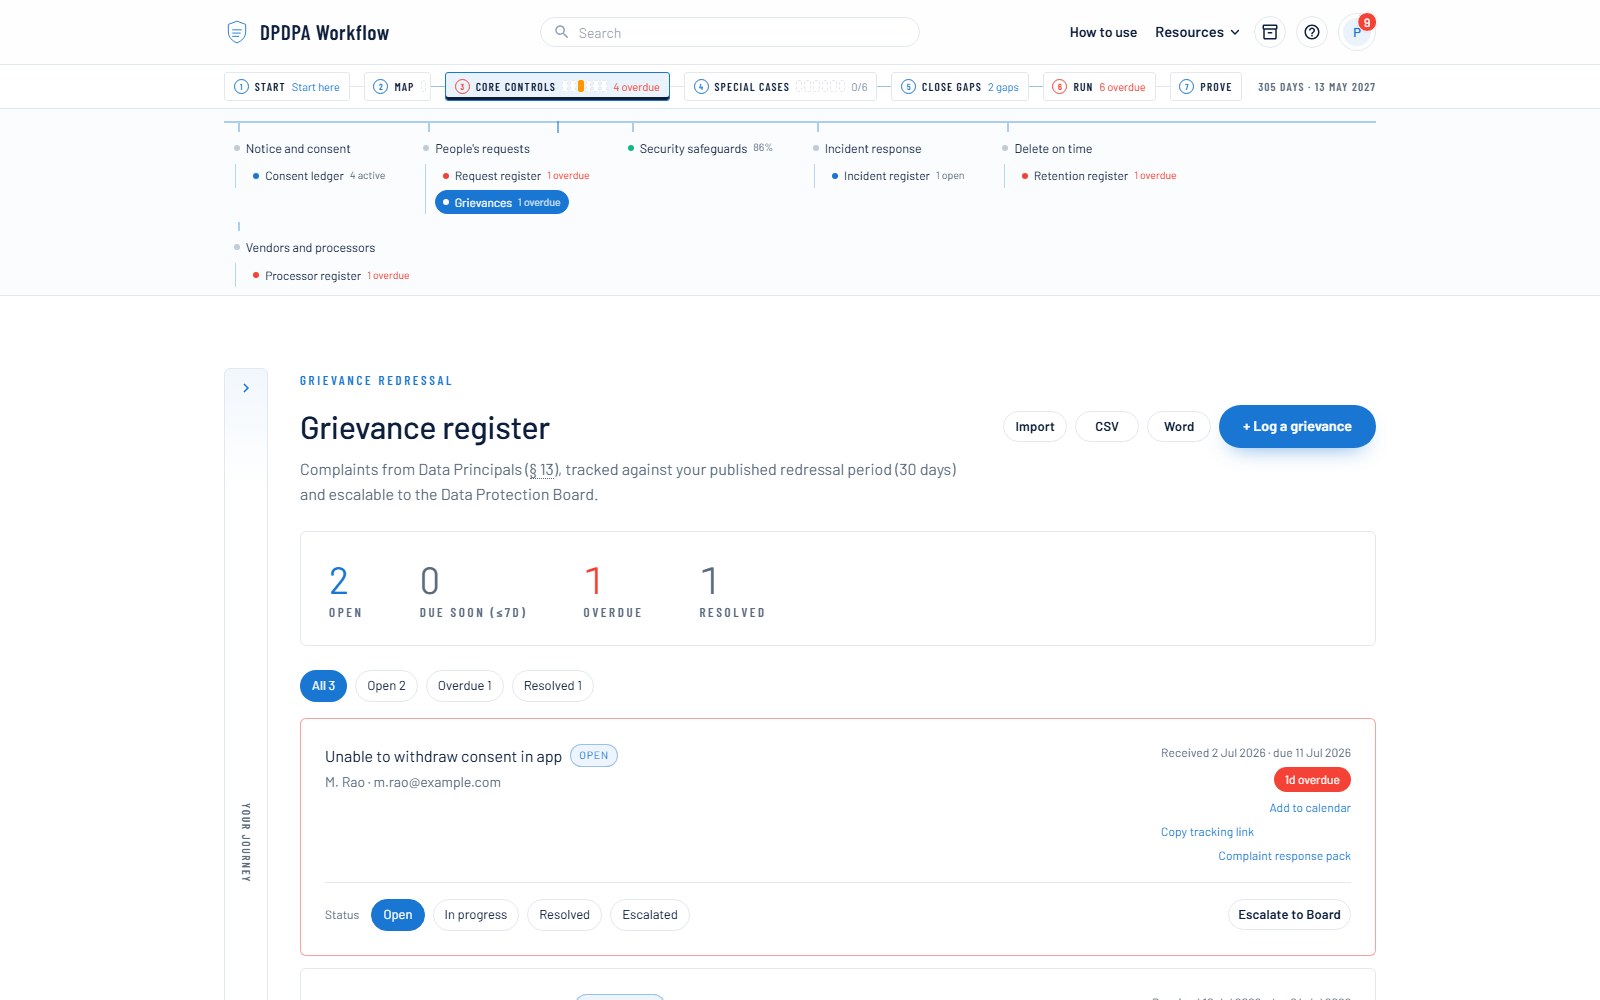
Grievance register
The objective
Resolve every complaint inside your published window, before it escalates to the Board.
- 1
Log each grievance with its channel and subject — the redressal clock starts on receipt.
- 2
Track progress; overdue grievances surface on the dashboard.
- 3
Record the resolution — after your process, a Data Principal may escalate to the Board, and your register is the story you tell.
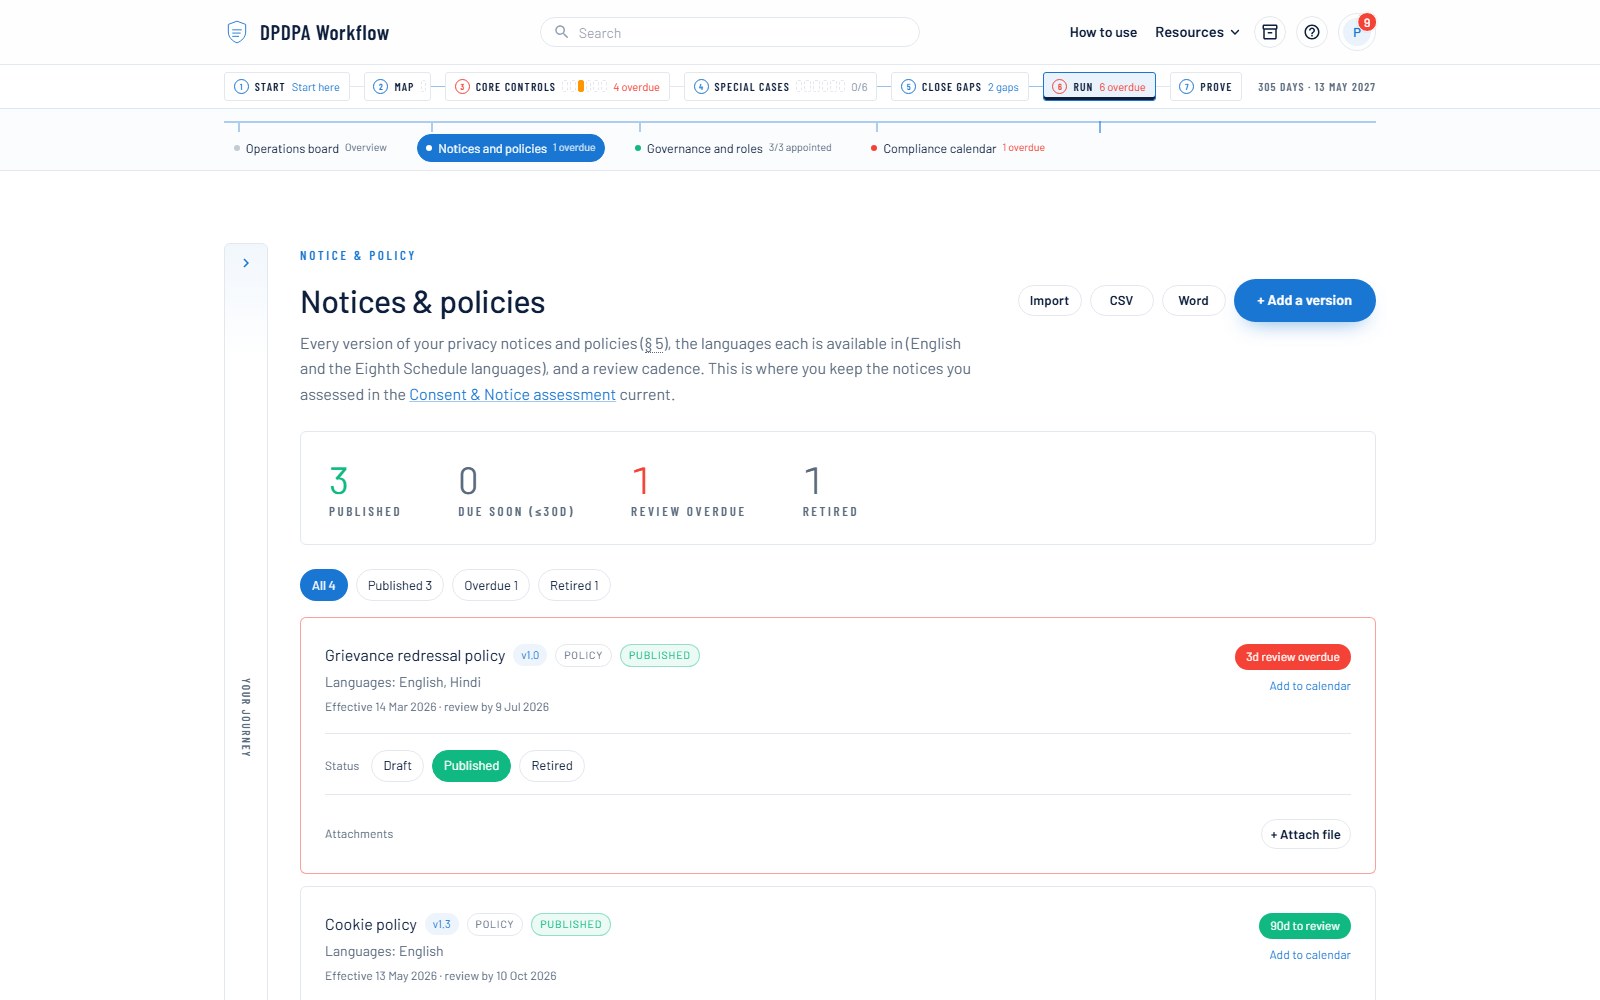
Notices & policies
The objective
Keep every notice versioned, multilingual and reviewed — and know which version was live when.
- 1
Add each notice and policy with its version, languages and effective date.
- 2
Attach the actual document to every version.
- 3
Set review dates — the calendar surfaces them; retire versions rather than deleting, so the ledger can point at them.
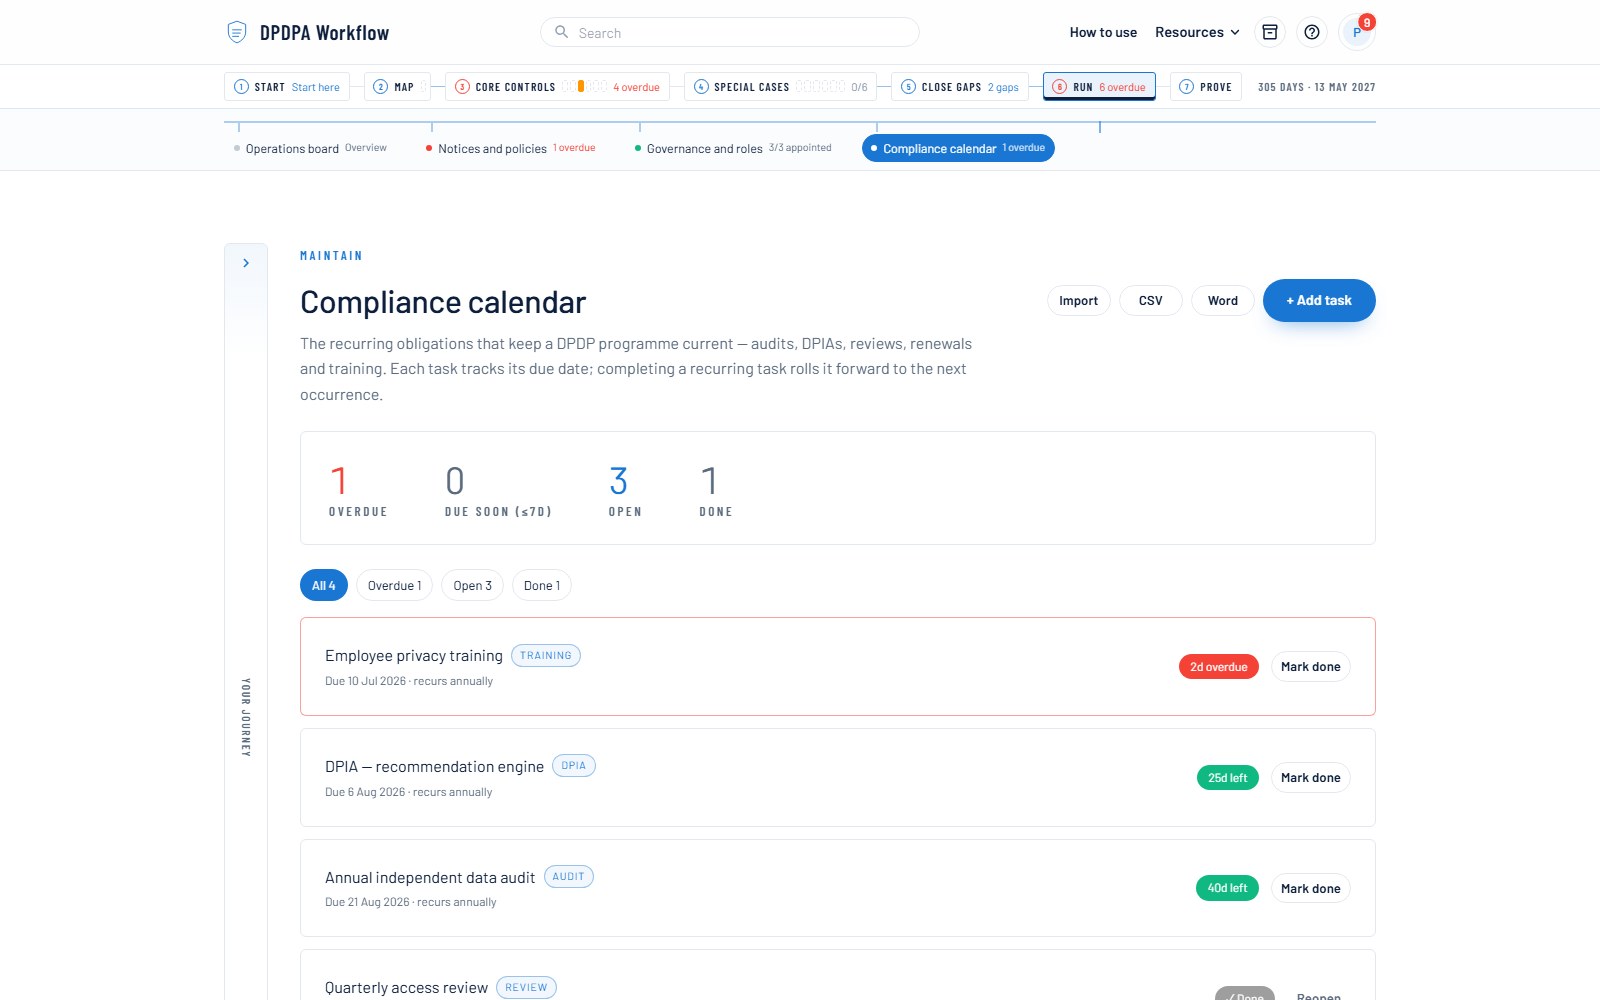
Compliance calendar
The objective
Keep the recurring duties — audits, DPIAs, training, reviews — running on cadence.
- 1
Add each recurring obligation with its due date and cadence.
- 2
Export to your own calendar (ICS) so deadlines live where you already look.
- 3
Mark items done — completed cycles are evidence that the programme runs, not just exists.
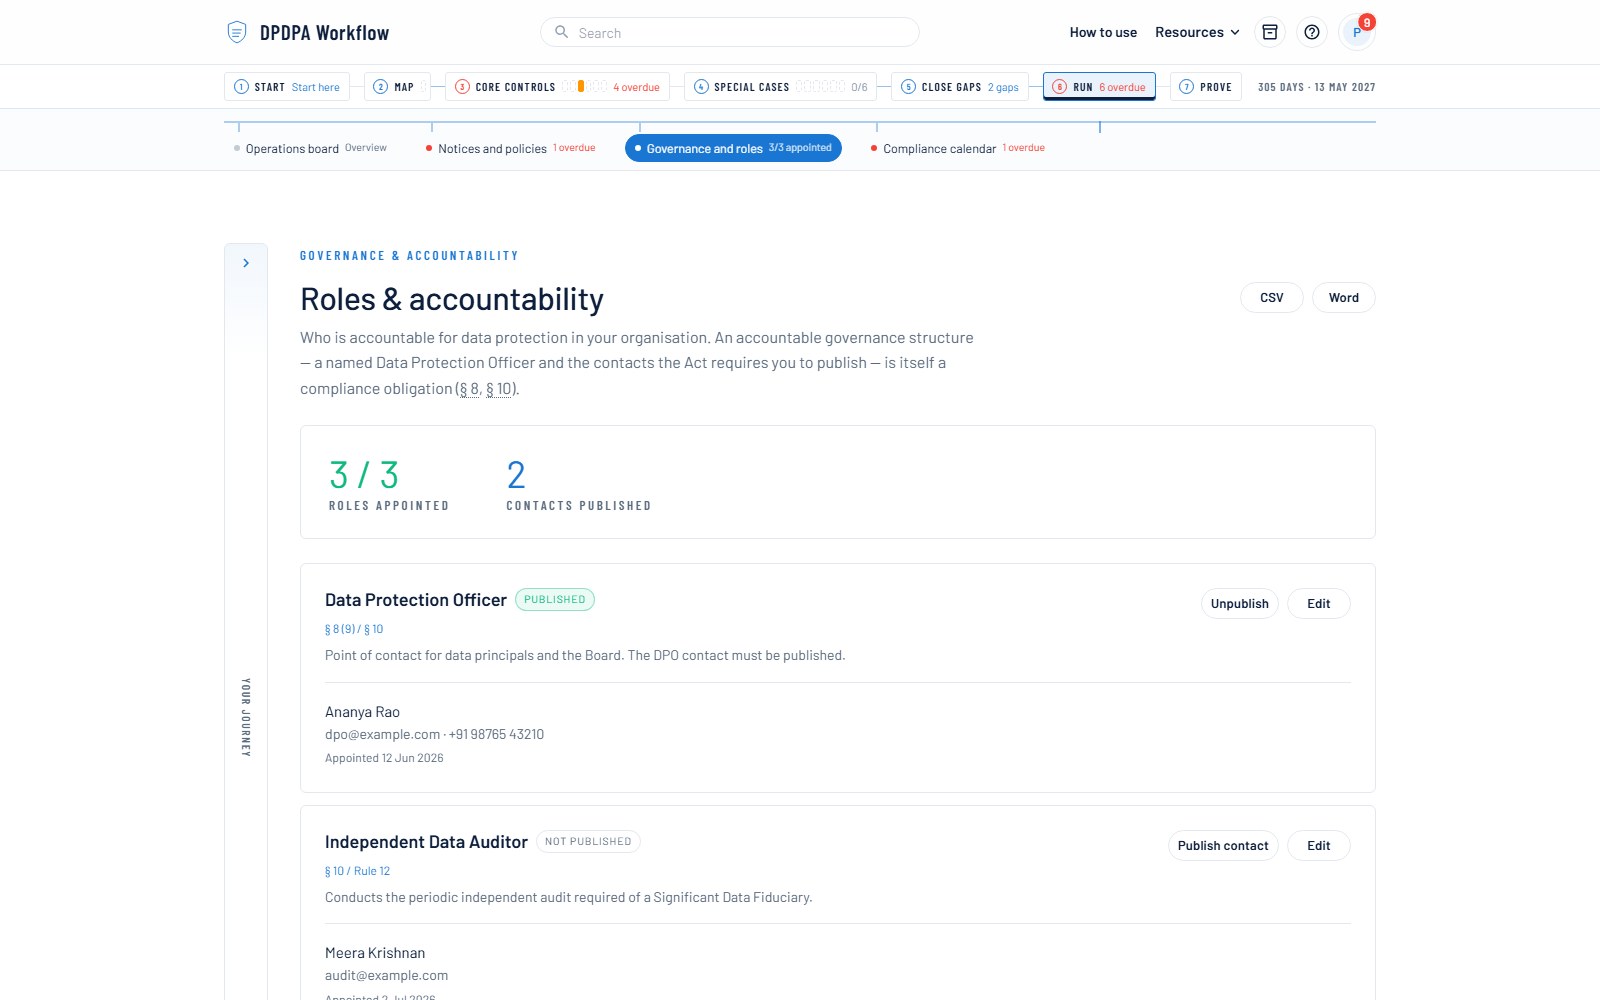
Governance & roles
The objective
Appoint and publish the accountable people — and prove the structure exists.
- 1
Record your DPO (or data-protection contact), grievance officer and auditor.
- 2
Mark each as published where the Act requires contact details to be reachable.
- 3
Keep appointment dates — auditors ask who was accountable, since when.
04
Prove — show your work
Point-in-time outputs: artefacts an auditor, a board or the Data Protection Board can read — available at any time, not after everything else.
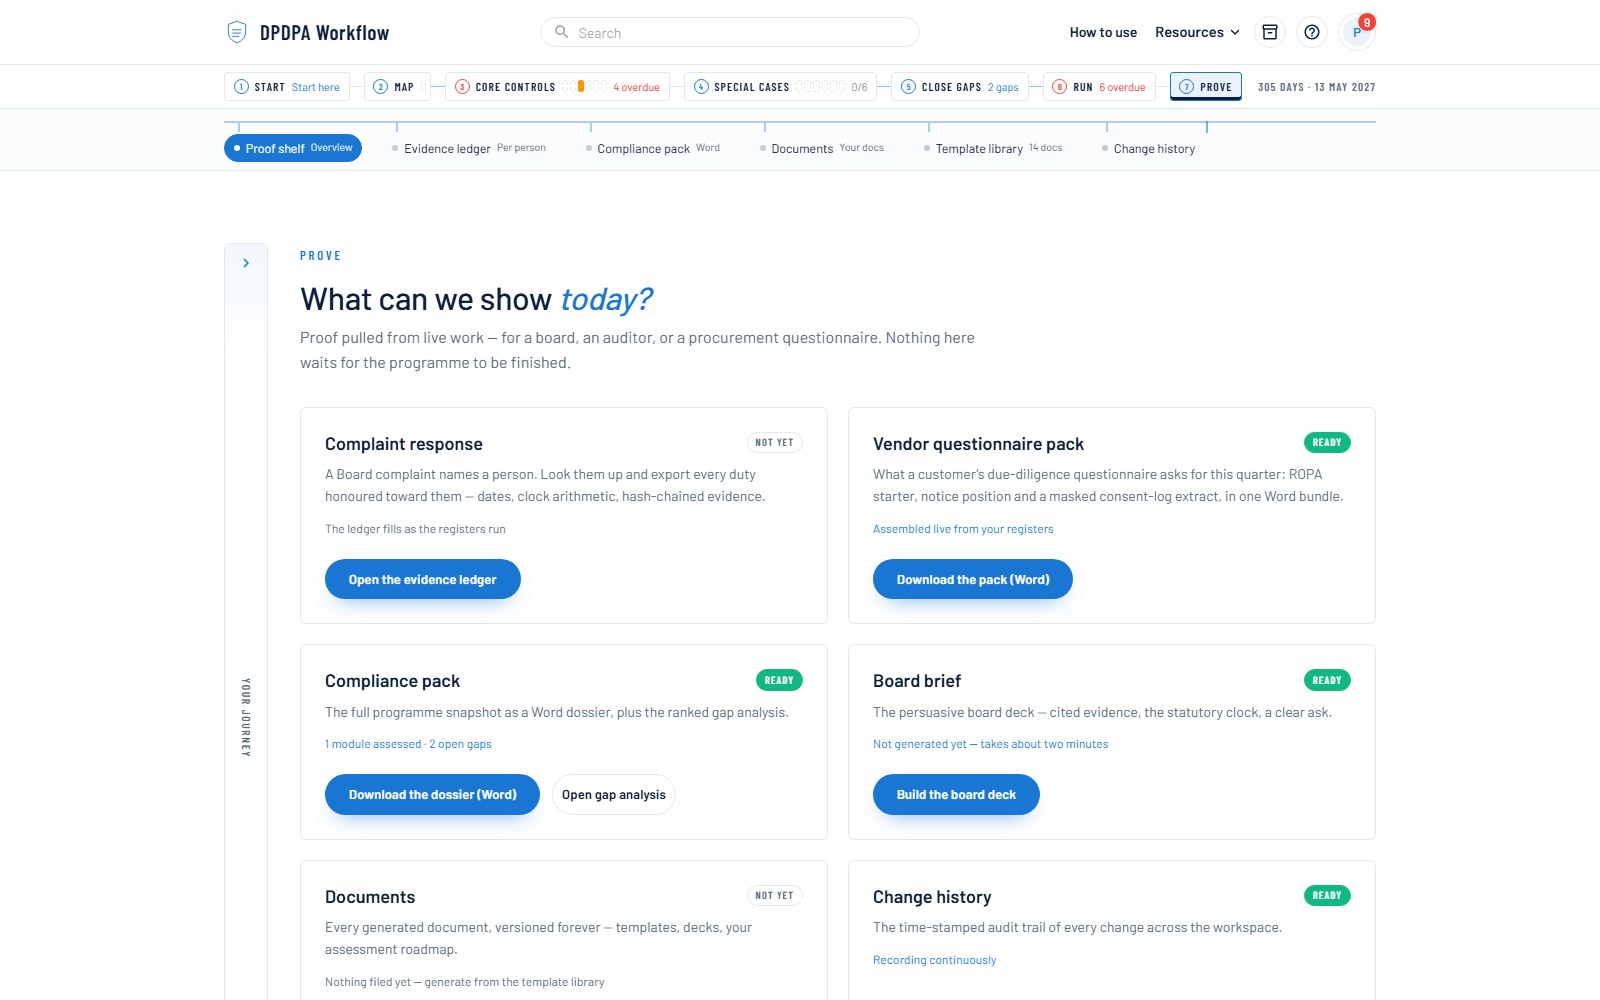
The proof shelf
The objective
Pull evidence from live work — the complaint response, the vendor questionnaire pack and the compliance dossier, each with its readiness.
- 1
Open station ⑦ Prove on the journey bar and click "Proof shelf".
- 2
Check each tile: what it is, whether it is ready, and what it draws on.
- 3
Download what the moment needs: the vendor questionnaire pack for a customer, the compliance dossier for auditors, the complaint response pack when a specific person is named.
- 4
Come here any time — proof does not wait for the programme to be finished.
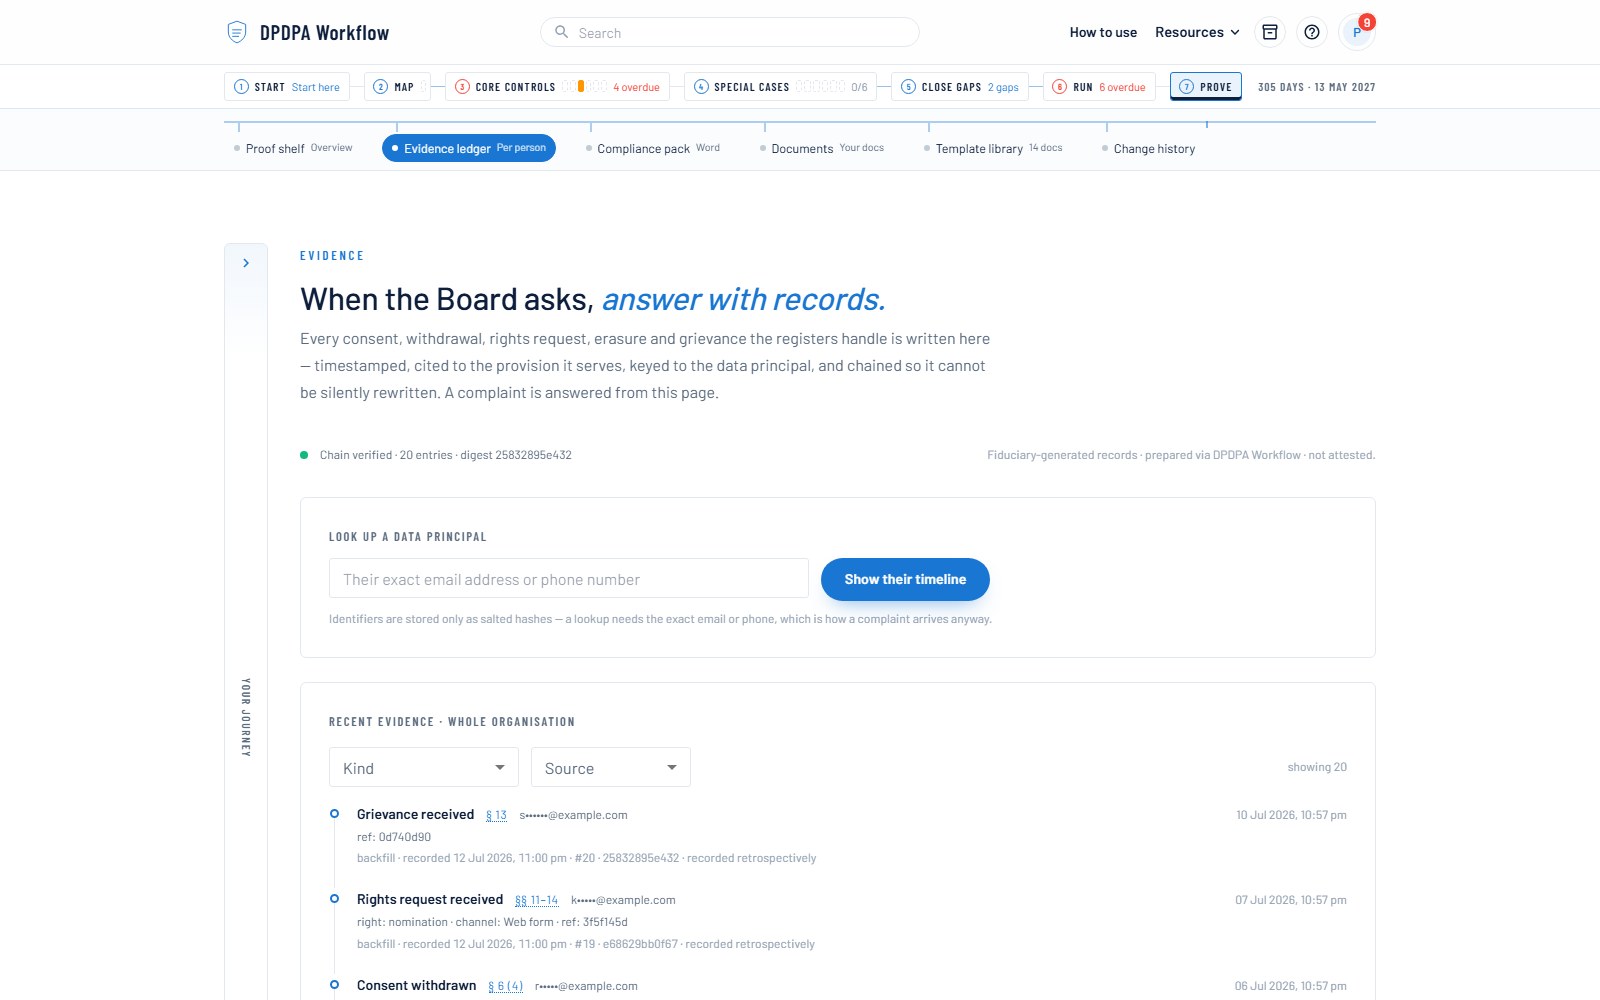
Evidence ledger & complaint response
The objective
Answer a Board complaint with records: every duty honoured toward one person, timestamped, cited and hash-chained — exported as one Word pack.
- 1
Open Prove → Evidence ledger. Everything the registers handle is already here — each entry with its citation, source, operator and hash.
- 2
Look a person up with their exact email or phone (identities are stored only as salted hashes — the identifier arrives with the complaint anyway).
- 3
Generate the complaint response pack: duty-by-duty summary with the clock arithmetic, the full timeline, and honest "no record found" gaps.
- 4
Record evidence manually for acts outside the registers — paper consent, a phone-handled request — or append a correction; nothing is ever edited.
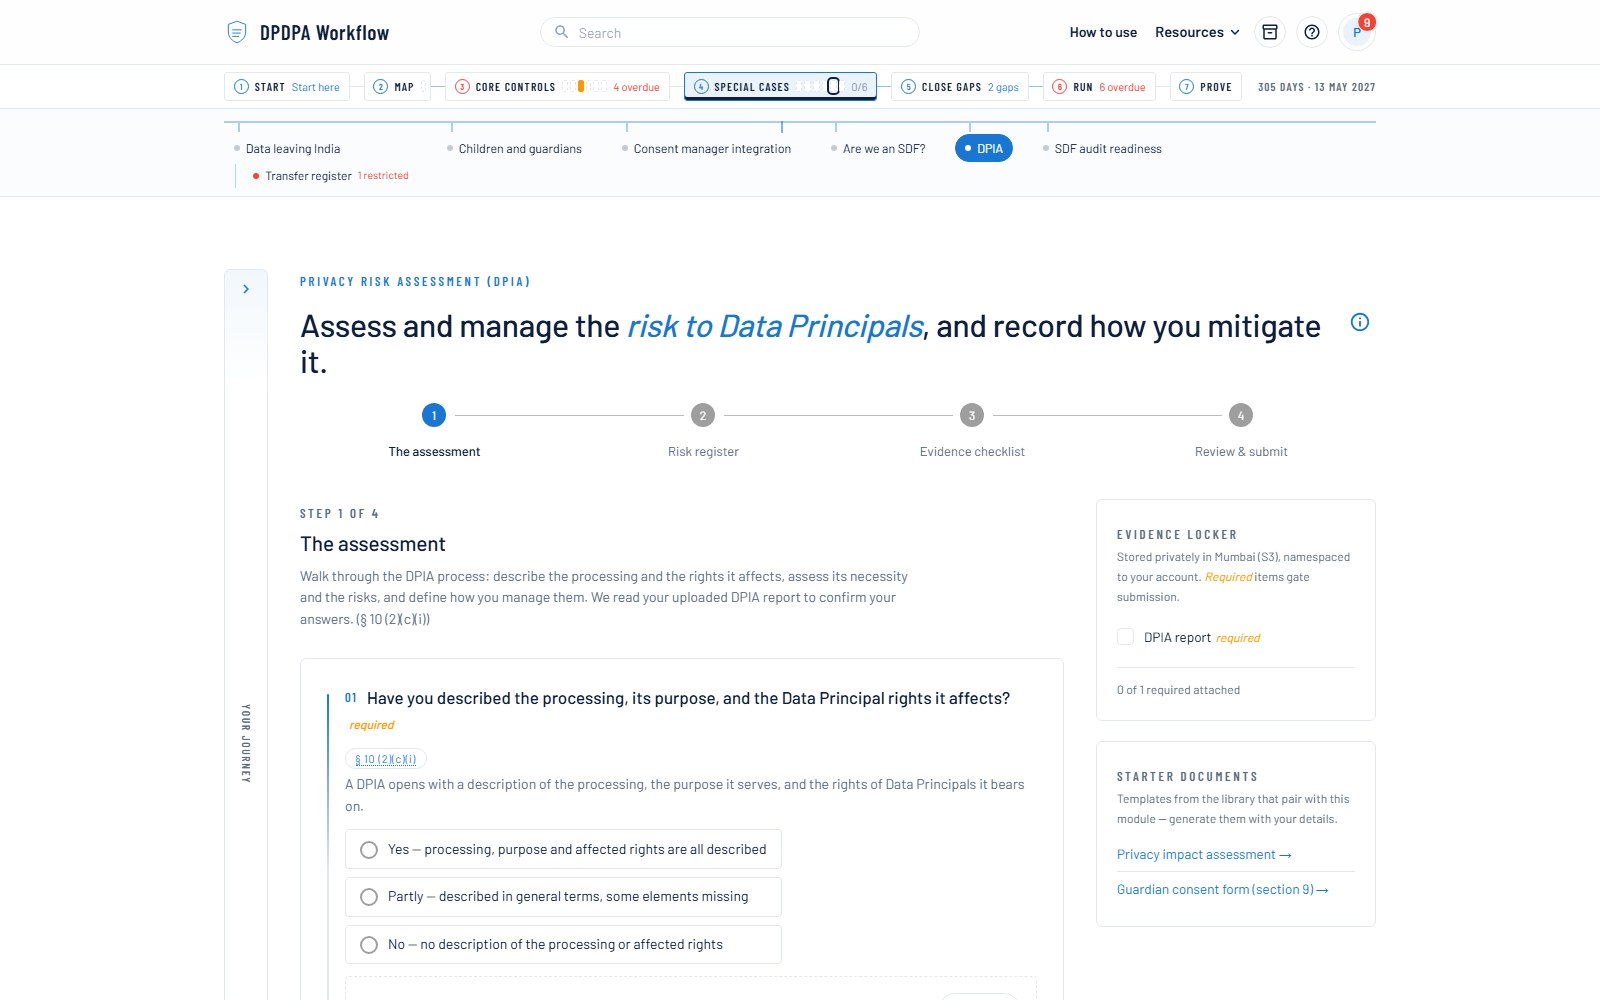
Data Protection Impact Assessment
The objective
Produce the structured DPIA artefact for a high-risk processing activity.
- 1
Describe the processing activity and its necessity.
- 2
Weigh the risks to Data Principals and record the mitigations.
- 3
Record the residual risk you accept and set the review date — the DPIA is a living document.
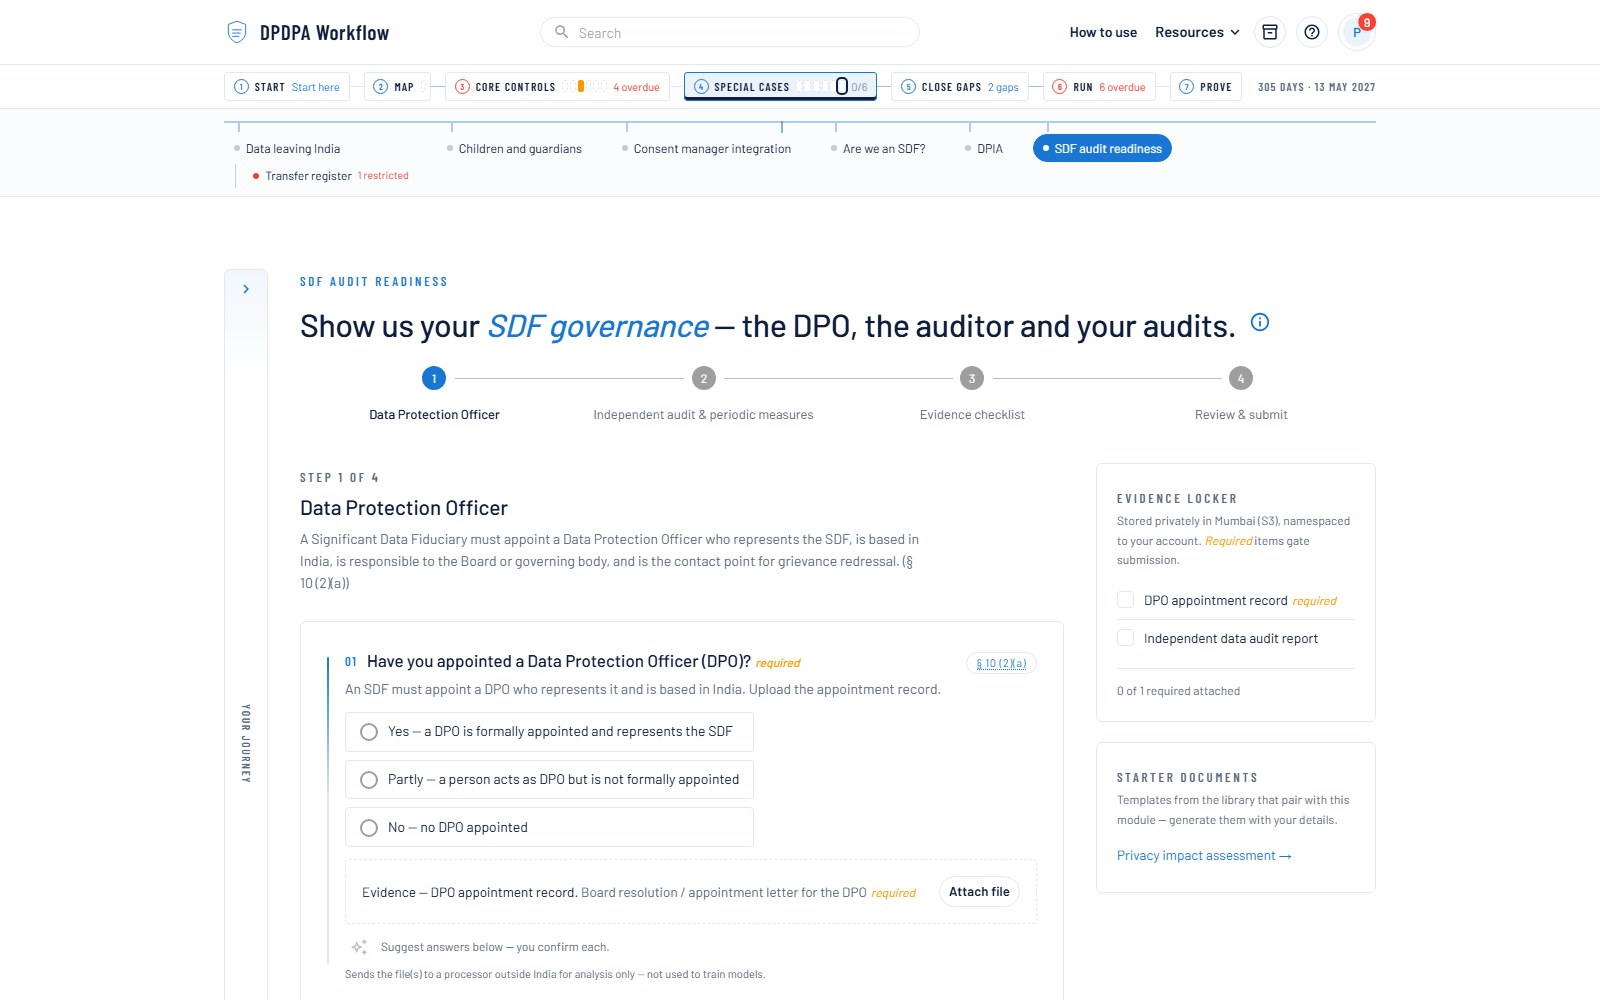
SDF audit readiness
The objective
Assemble the evidence trail before the annual independent audit, not during it.
- 1
Walk the audit-scope questions to see what the auditor will ask for.
- 2
Gather the evidence each answer points at — registers, policies, reports already in your workspace.
- 3
Track findings to closure and keep the trail current between audits.
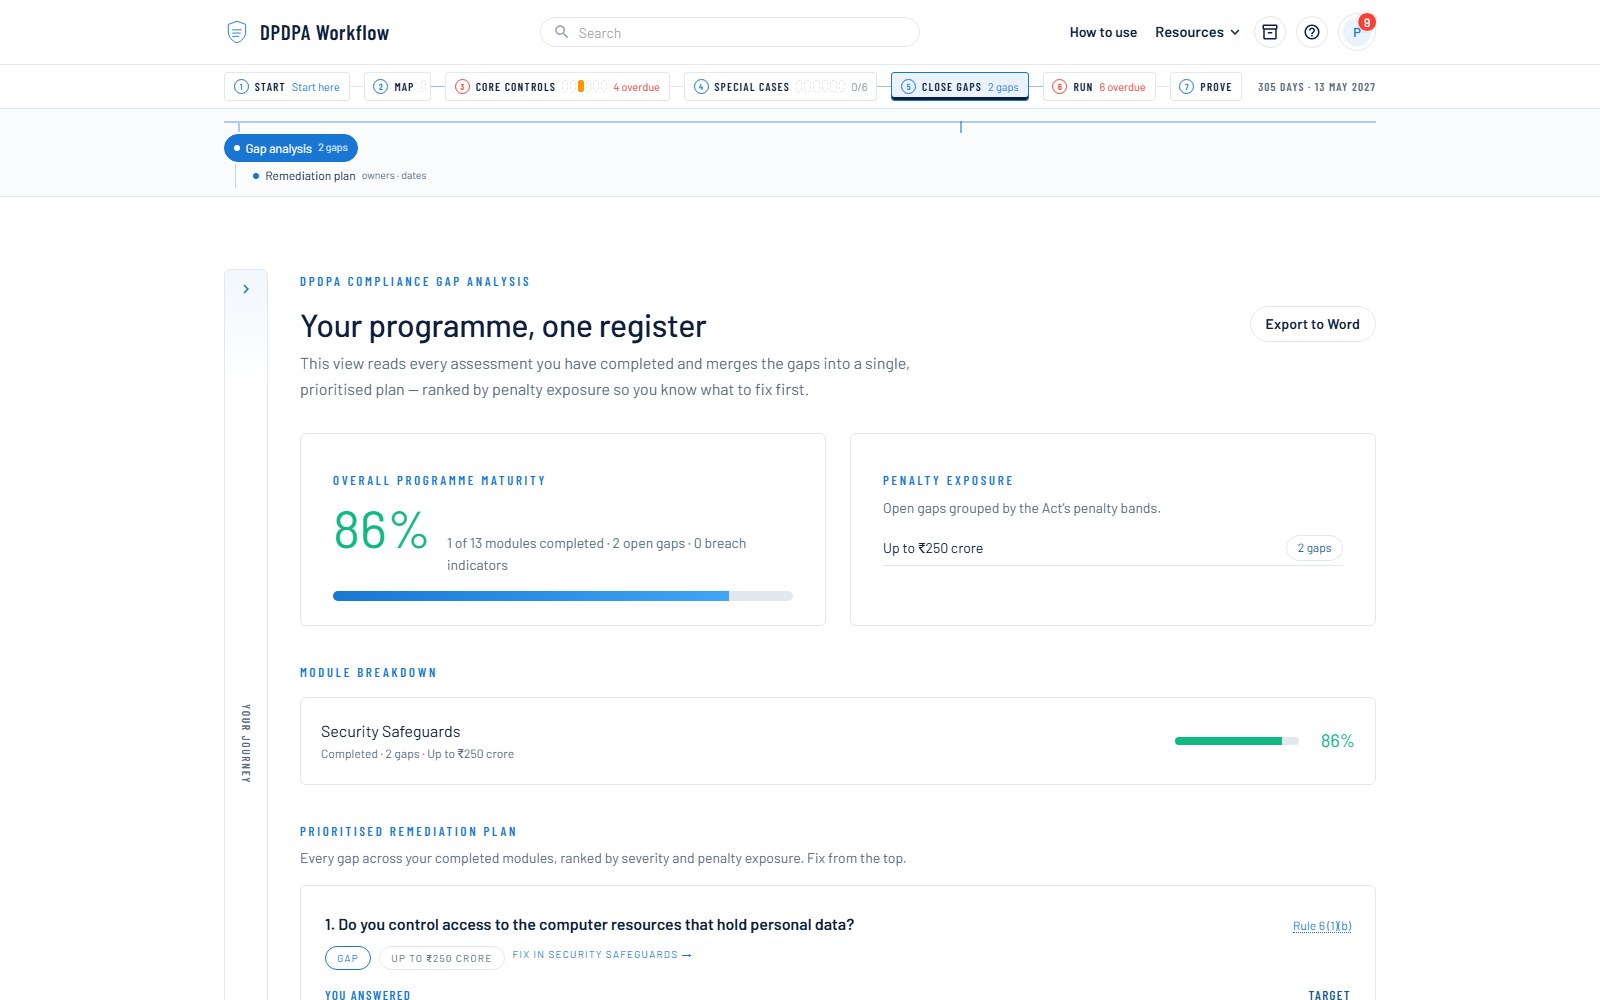
Gap analysis
The objective
One ranked remediation plan across every module you have completed.
- 1
Complete at least one assessment module first — the analysis reads their answers.
- 2
Review every open gap, ranked by severity and penalty exposure.
- 3
Assign each gap an owner and a target date with "Work this" — open remediation shows on the Run board until it is closed with a note of what changed.
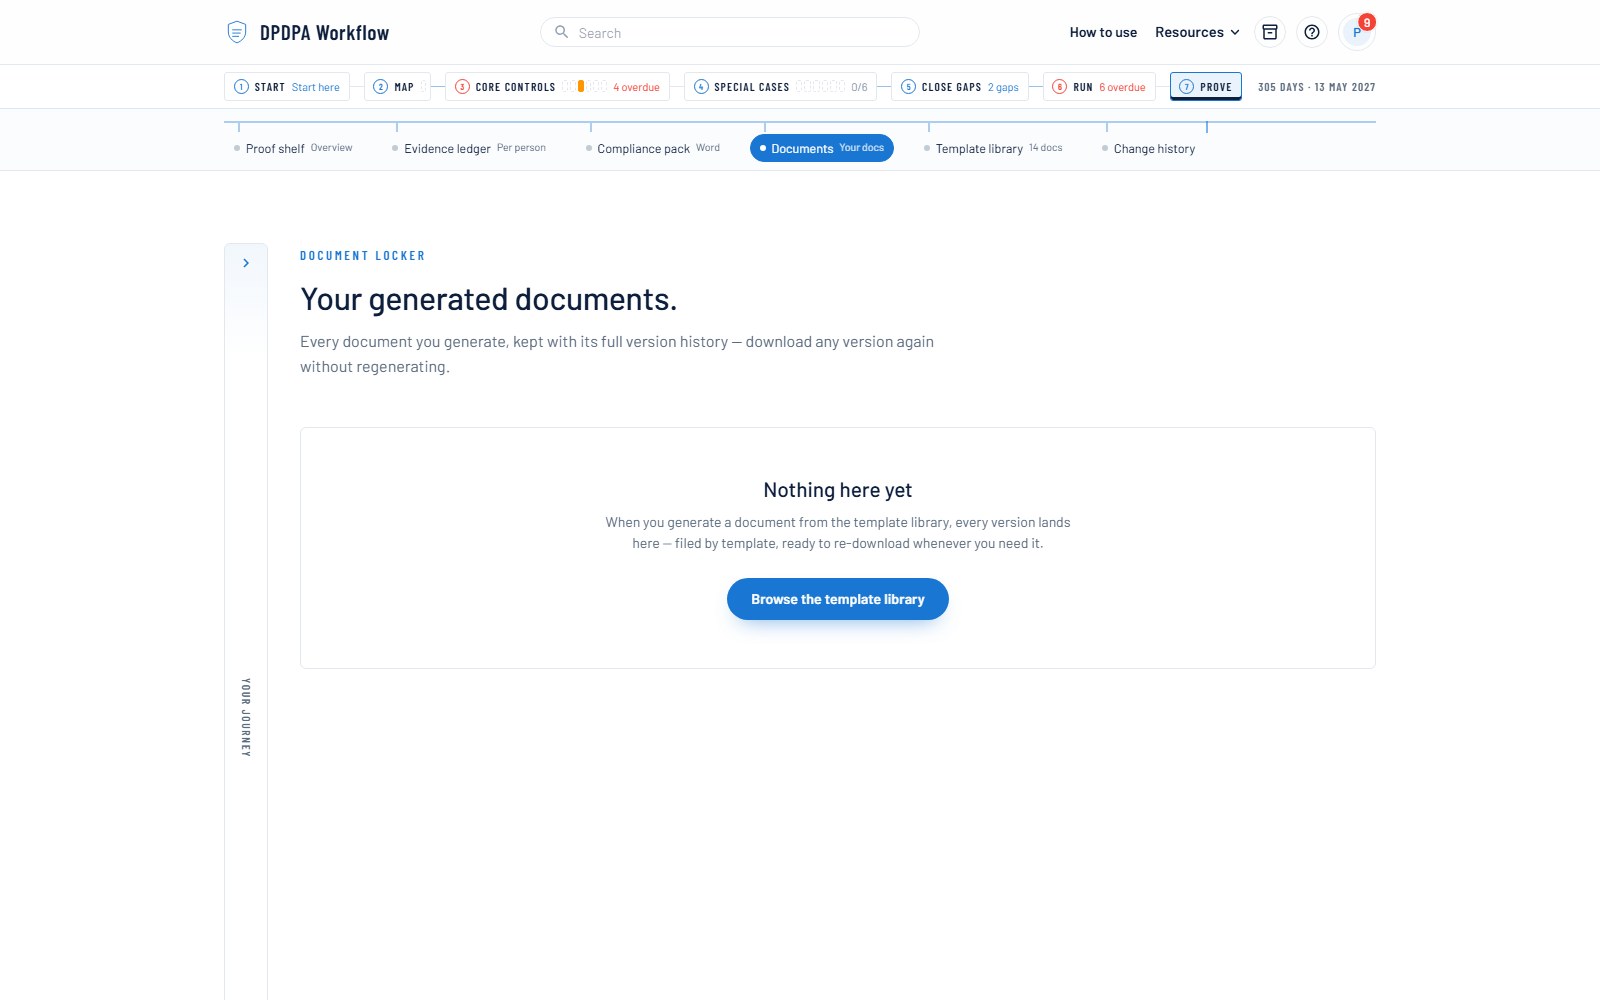
Document locker
The objective
Re-download the exact version of anything you generated — years later, in front of an auditor.
- 1
Open the locker from the briefcase icon in the header — it works from every page.
- 2
Find your documents grouped by kind, every version kept: templates, board decks, assessment roadmaps.
- 3
Download any version again; nothing is ever regenerated or silently changed.
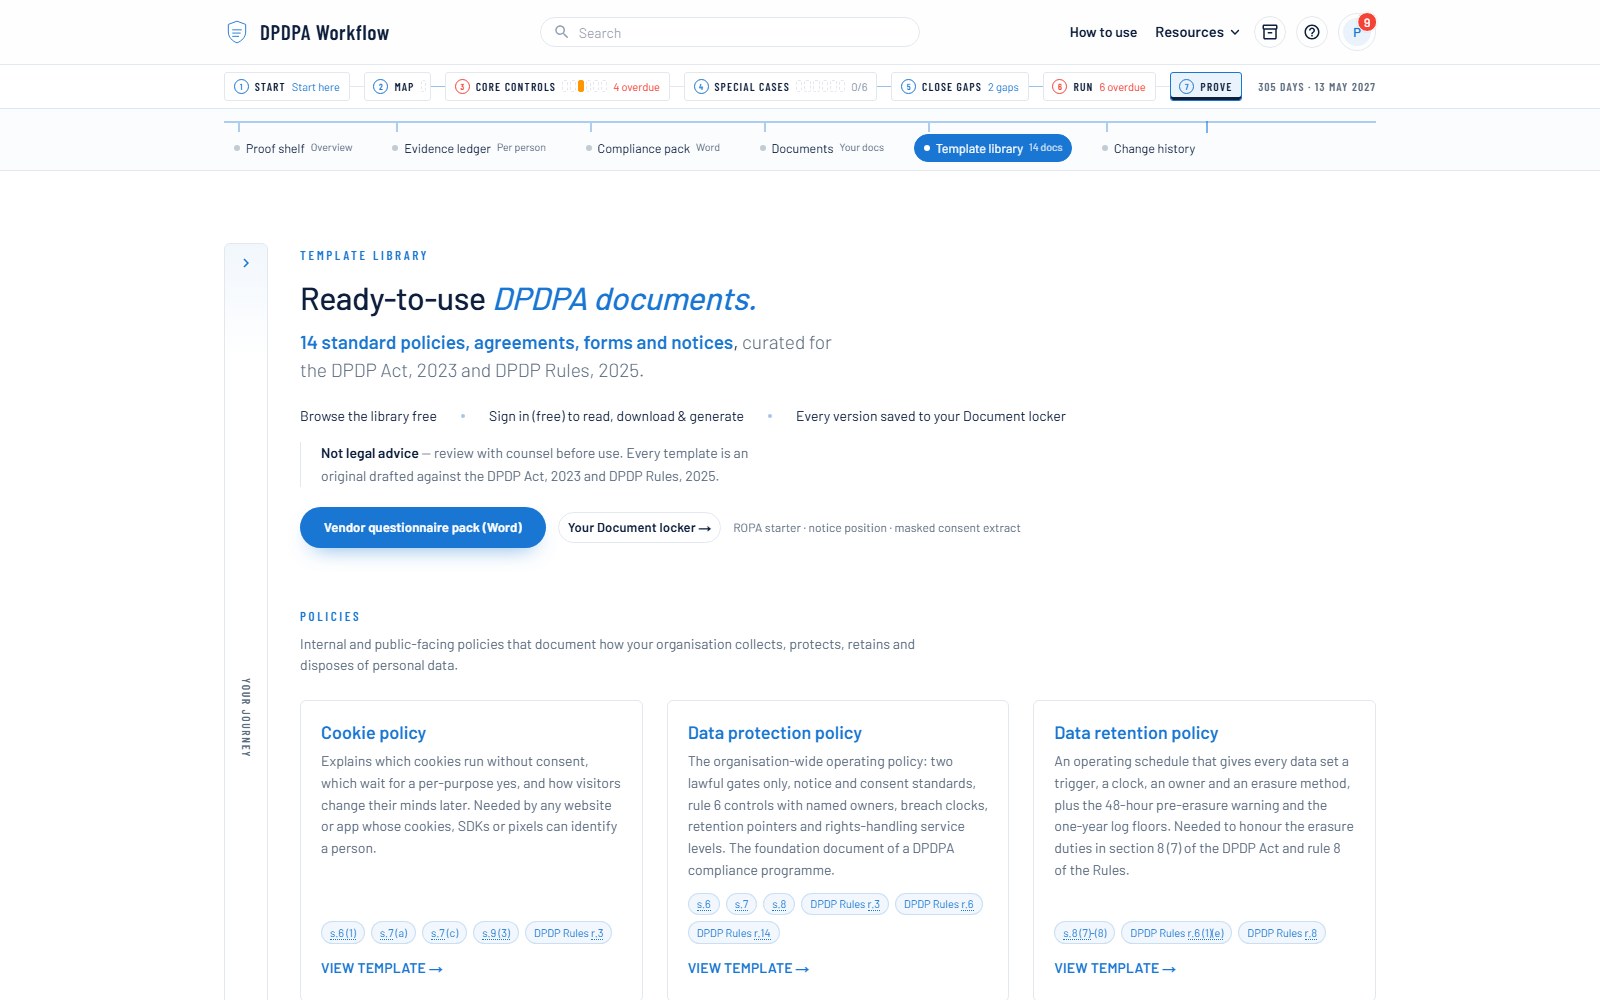
Template library
The objective
Turn a blank-page problem into a review problem: fourteen DPDPA-shaped documents, generated with your details.
- 1
Pick a template — notices, DPAs, breach playbooks, each cited to the clauses it serves.
- 2
Fill the placeholders; your organisation profile prefills the common ones after the first time.
- 3
Generate the Word document — it lands in your Document locker, versioned.
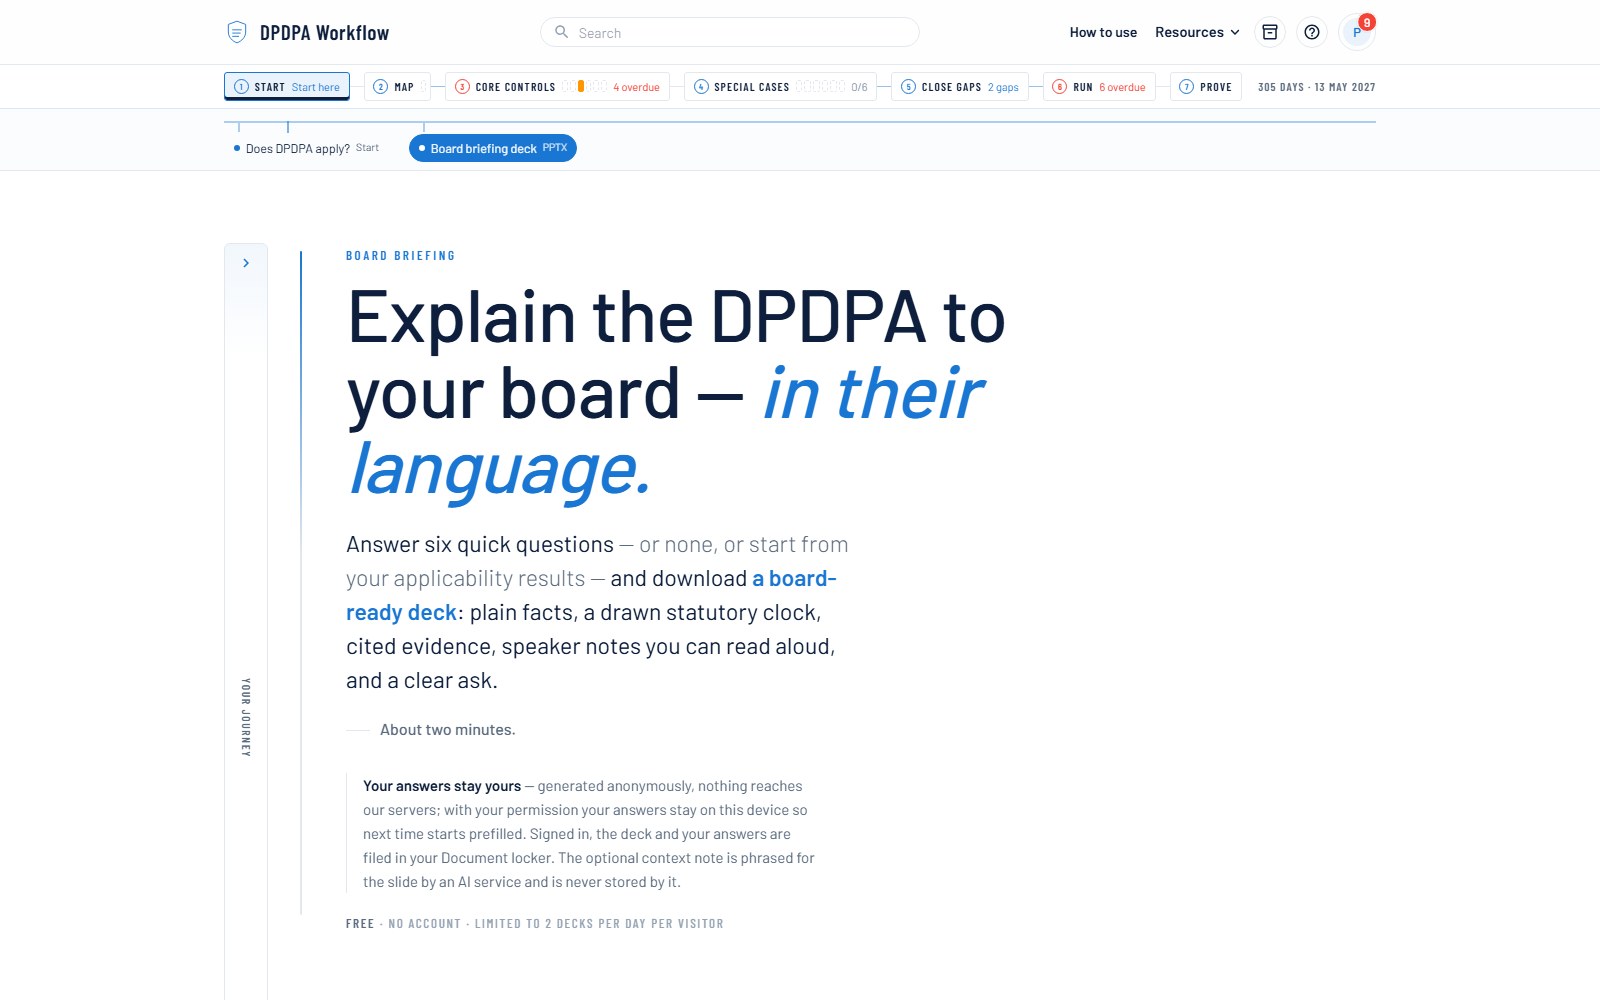
Board briefing deck
The objective
Walk into the boardroom with a persuasive, evidence-backed deck — built in two minutes.
- 1
Choose your build path: answer six quick questions, or start from your applicability results.
- 2
Pick your goals — the deck shapes its ask around them.
- 3
Download the PowerPoint: cited evidence, a drawn statutory timeline, speaker notes you can read aloud.
- 4
Signed in, every deck and its answers are filed in your Document locker automatically.